Custom Request Use Cases
Updated At: 2026-01-28
- Effortlessly manage your company's approval process for common work-related requests.
- Learn how to create custom requests, such as ‘Certificate Issuance’, with this guide.
📢 Note
• Managing custom request types is only possible on the PC Web.
Web
STEP 1 ) Go to Manage > Custom Request Types and click + Add Custom Request Type button in the top right corner.

STEP 2 ) Add a custom request type. Set up the desired format to streamline various requests within your company.
For instance, we will add ‘Certificate Issuance Request’ for easy document requests.
Click + Add Field to configure fields for the request.
Each field represents a selection/input item. You can add as many fields as needed.
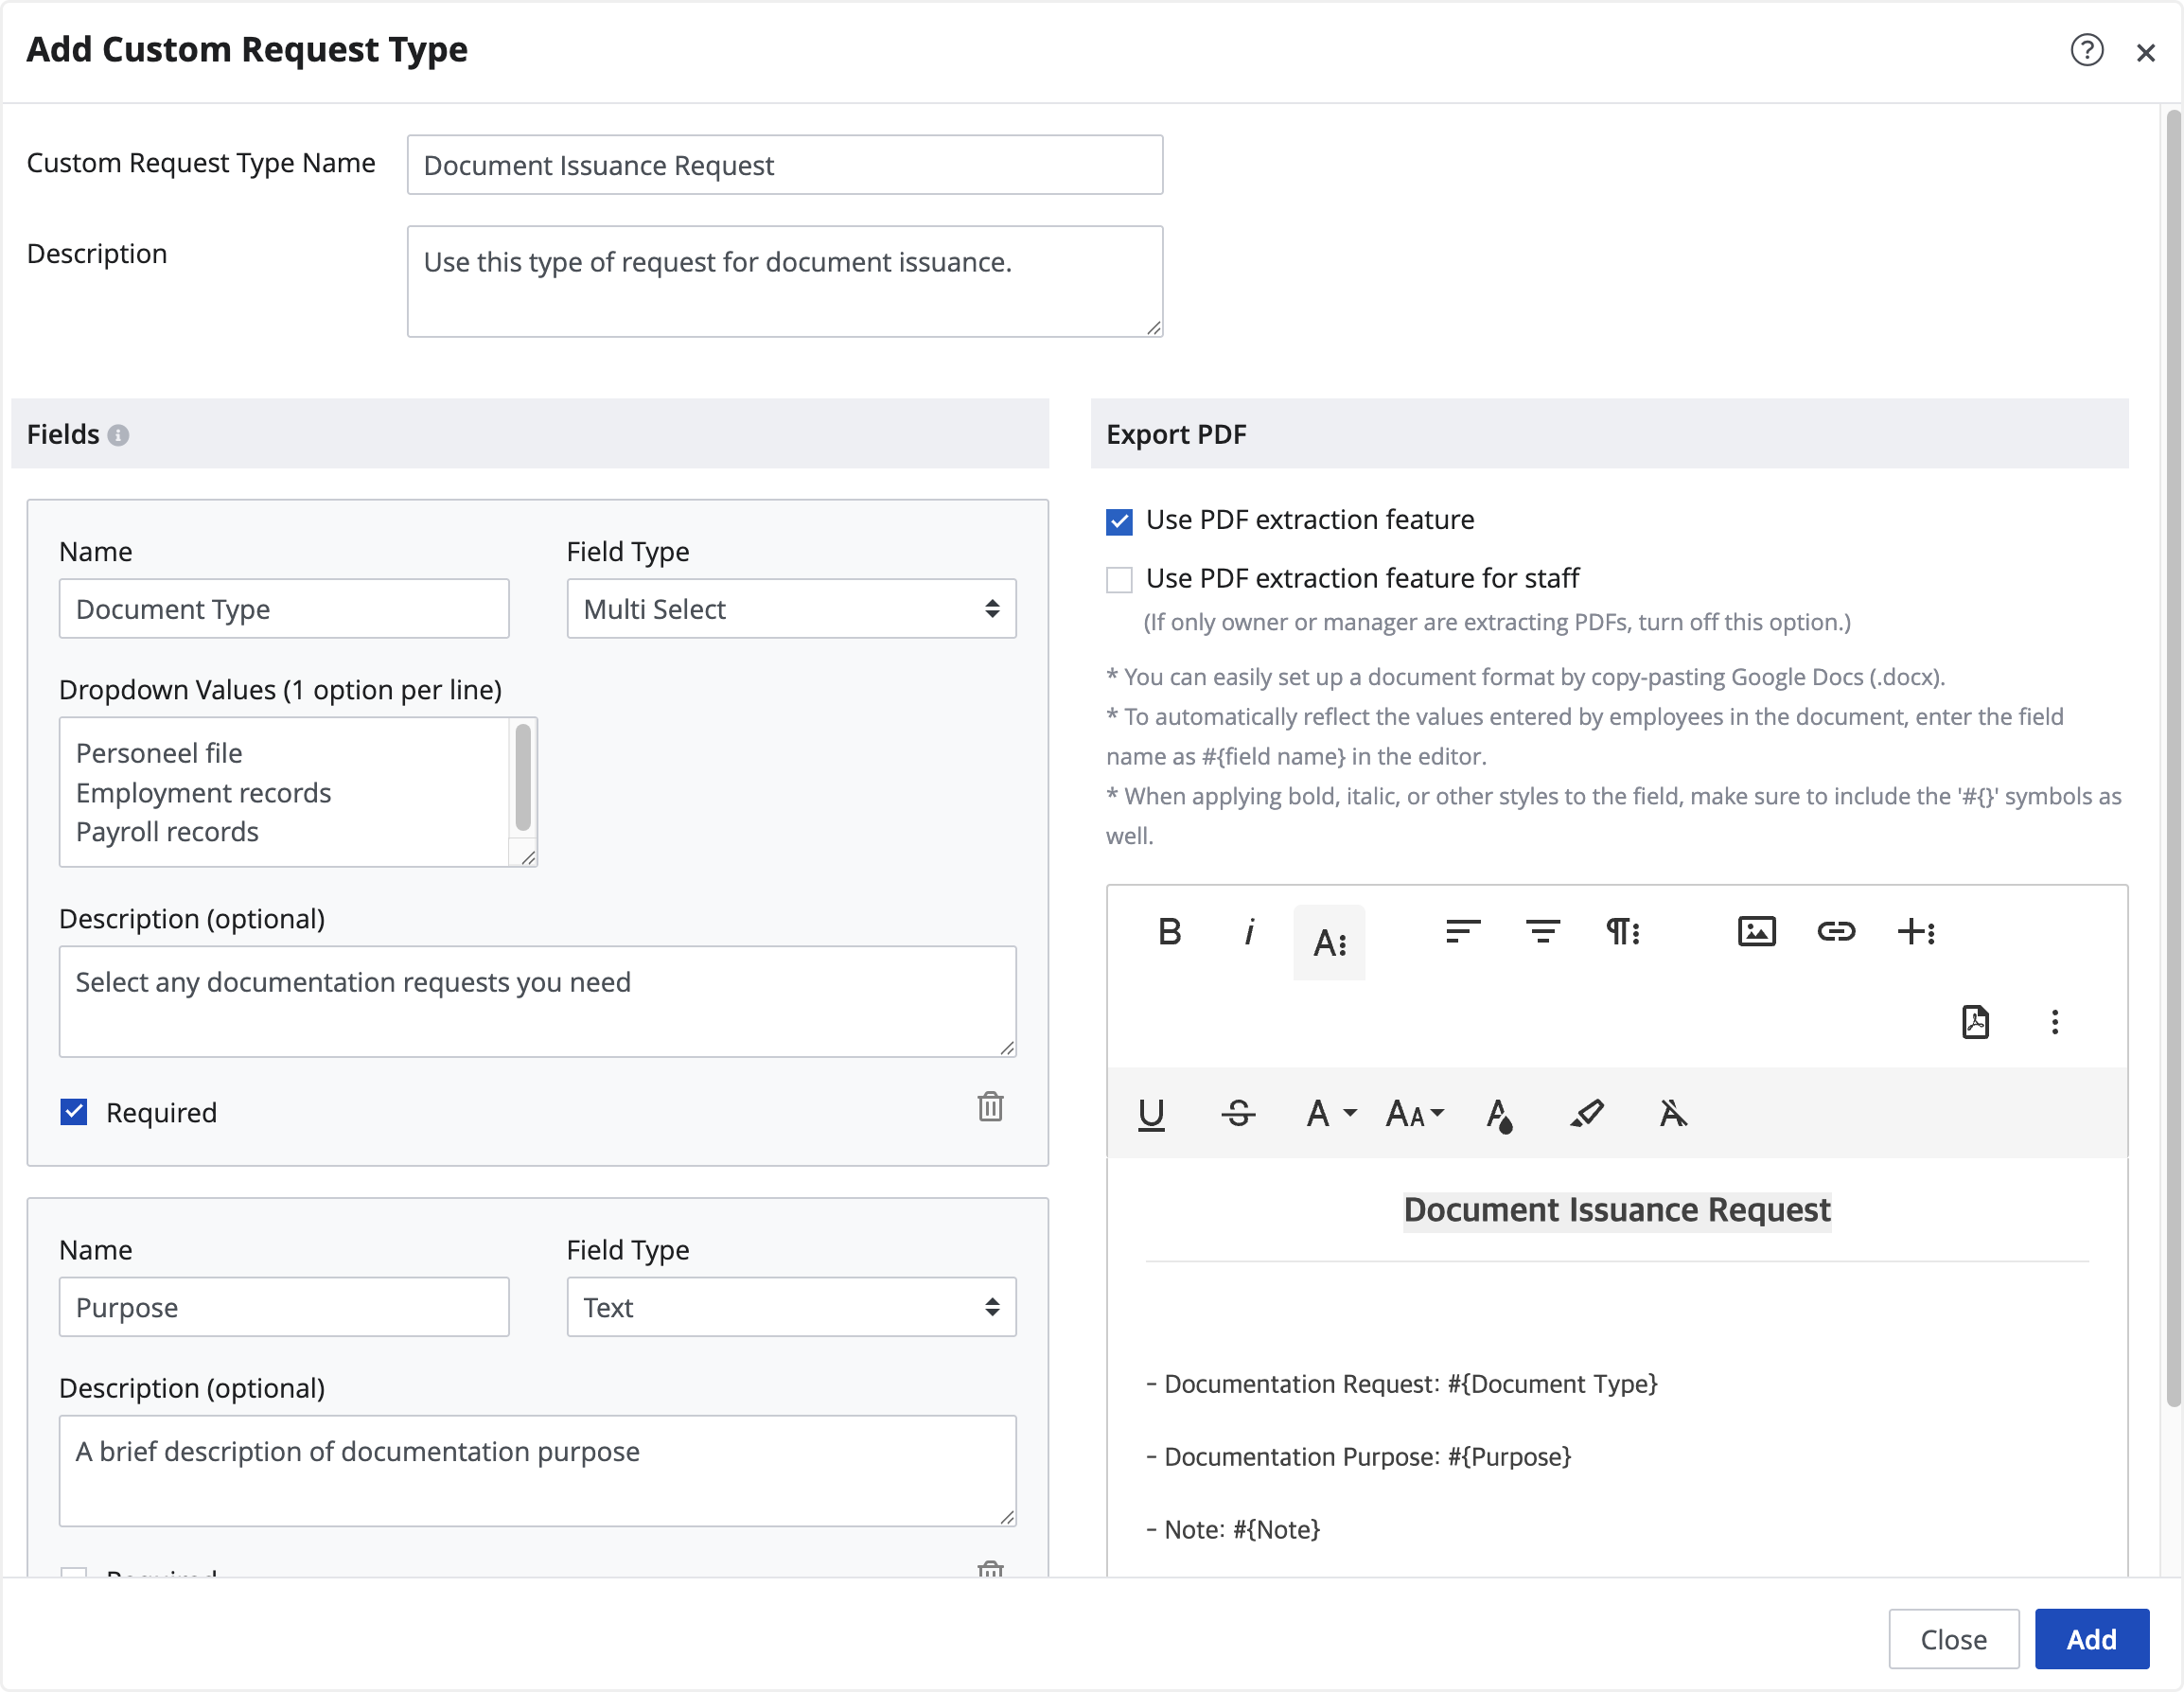
- Custom Request Type Name : Enter a name.
- Description : Provide details about the request for employees to reference.
- Name : Enter a name for a field.
- Field Type : Choose a response type for the field.
- Dropdwon Values : Only appears when Multi Select/Select is set in ③. Enter the choices that can be selected as answers. (One option per line.)
💡 Field Type
• Text: Enter any text.
• Number: Input numbers only.
• Date: Select a date.
• Checkbox: Click/Tap to resopnd.
• Select: Choose one option from the choices.
• Mulit Select: Select multiple options from the choices.
- Description (Optional) : Add a description for the field.
- Required : Choose whether an answer is required for this item.
- Use PDF Extraction Feature : Choose to extract the request into PDF file.
- Use PDF Extraction Feature for Staff : Choose to allow employees to export custom requests as PDF files. Employees can download the PDF directly from the requests menu when documents such as certificates are required.
- Insert Images : You can insert images using image links. Use this option when you need to insert images such as company seals, company logos, or banners into a message template. For detailed instructions, please refer to Example of Use ) Insert Images.
You can also enter and make changes in the input field located on the right side.
Now, you can send a request for certificate issuance using this request.
Send a Request from Mobile App
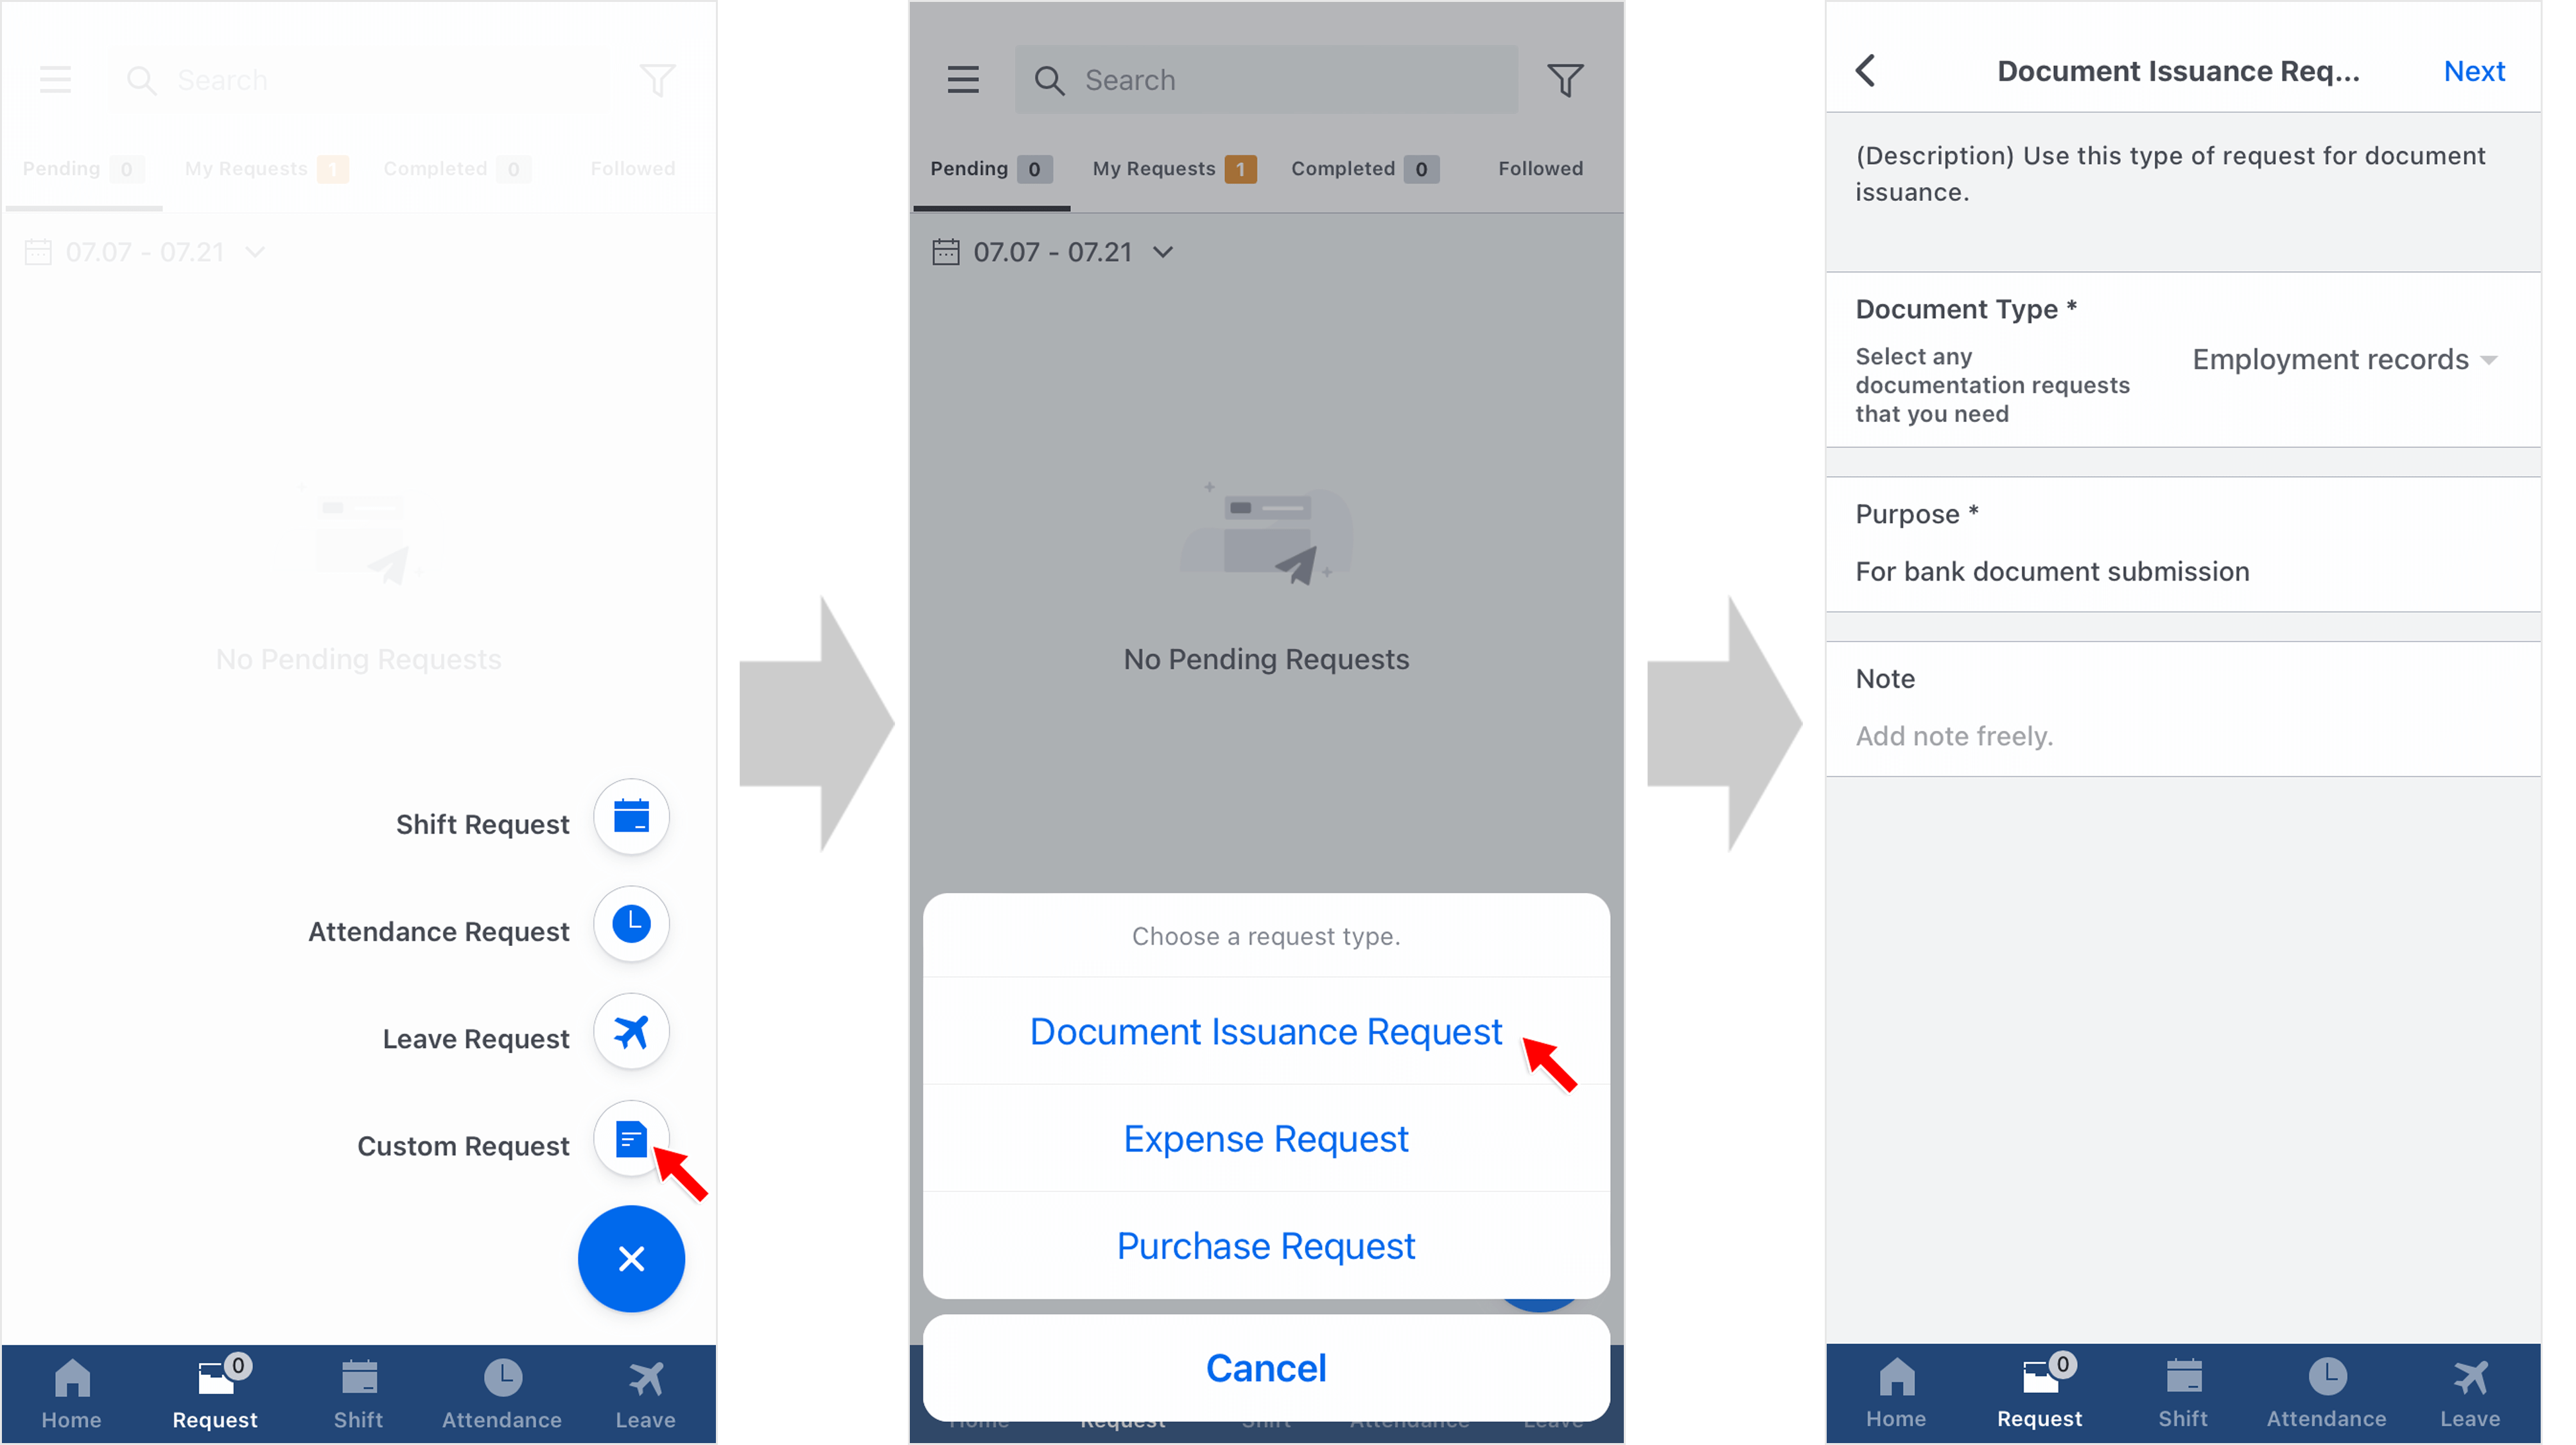
STEP 1 ) Tap the airplane button in the Request tab and select Custom Request.
STEP 2 ) Choose ‘Certificate Issuance Request’ from the list.
STEP 3 ) Fill out all required fields and tap ‘Next’.
📢 Note
Fields marked with '*' are mandatory. Ensure all fields are completed before proceeding.
STEP 4 ) Choose an approver and review your request before completing the request.
You can view sent requests in Requests Tab > My Requests. Pending requests can be canceled.
