Manage Custom Request Types
Updated At: 2026-04-27
- Need a request form for various types of requests in your company? Use a custom request to customize a workflow process in your company.
- Manage a workflow process in your company by customizing work-related, repetitive requests.
Note
• You can manage custom request types in web manager mode.
• Sending a create custom request is only available on the mobile app for now.
Web
STEP 1 ) Go to Manage > Custom Request Types from the menu in Web Manager Mode. Click on + Add Custom Request Type.

STEP 2 ) Add a custom request type. You can add a customized request to reflect various types of workflows in your company.
- Custom Request Type Name : Enter the name of a custom request.
- Description : Enter a brief description of this type of request. The description will be shown when employees make a request.
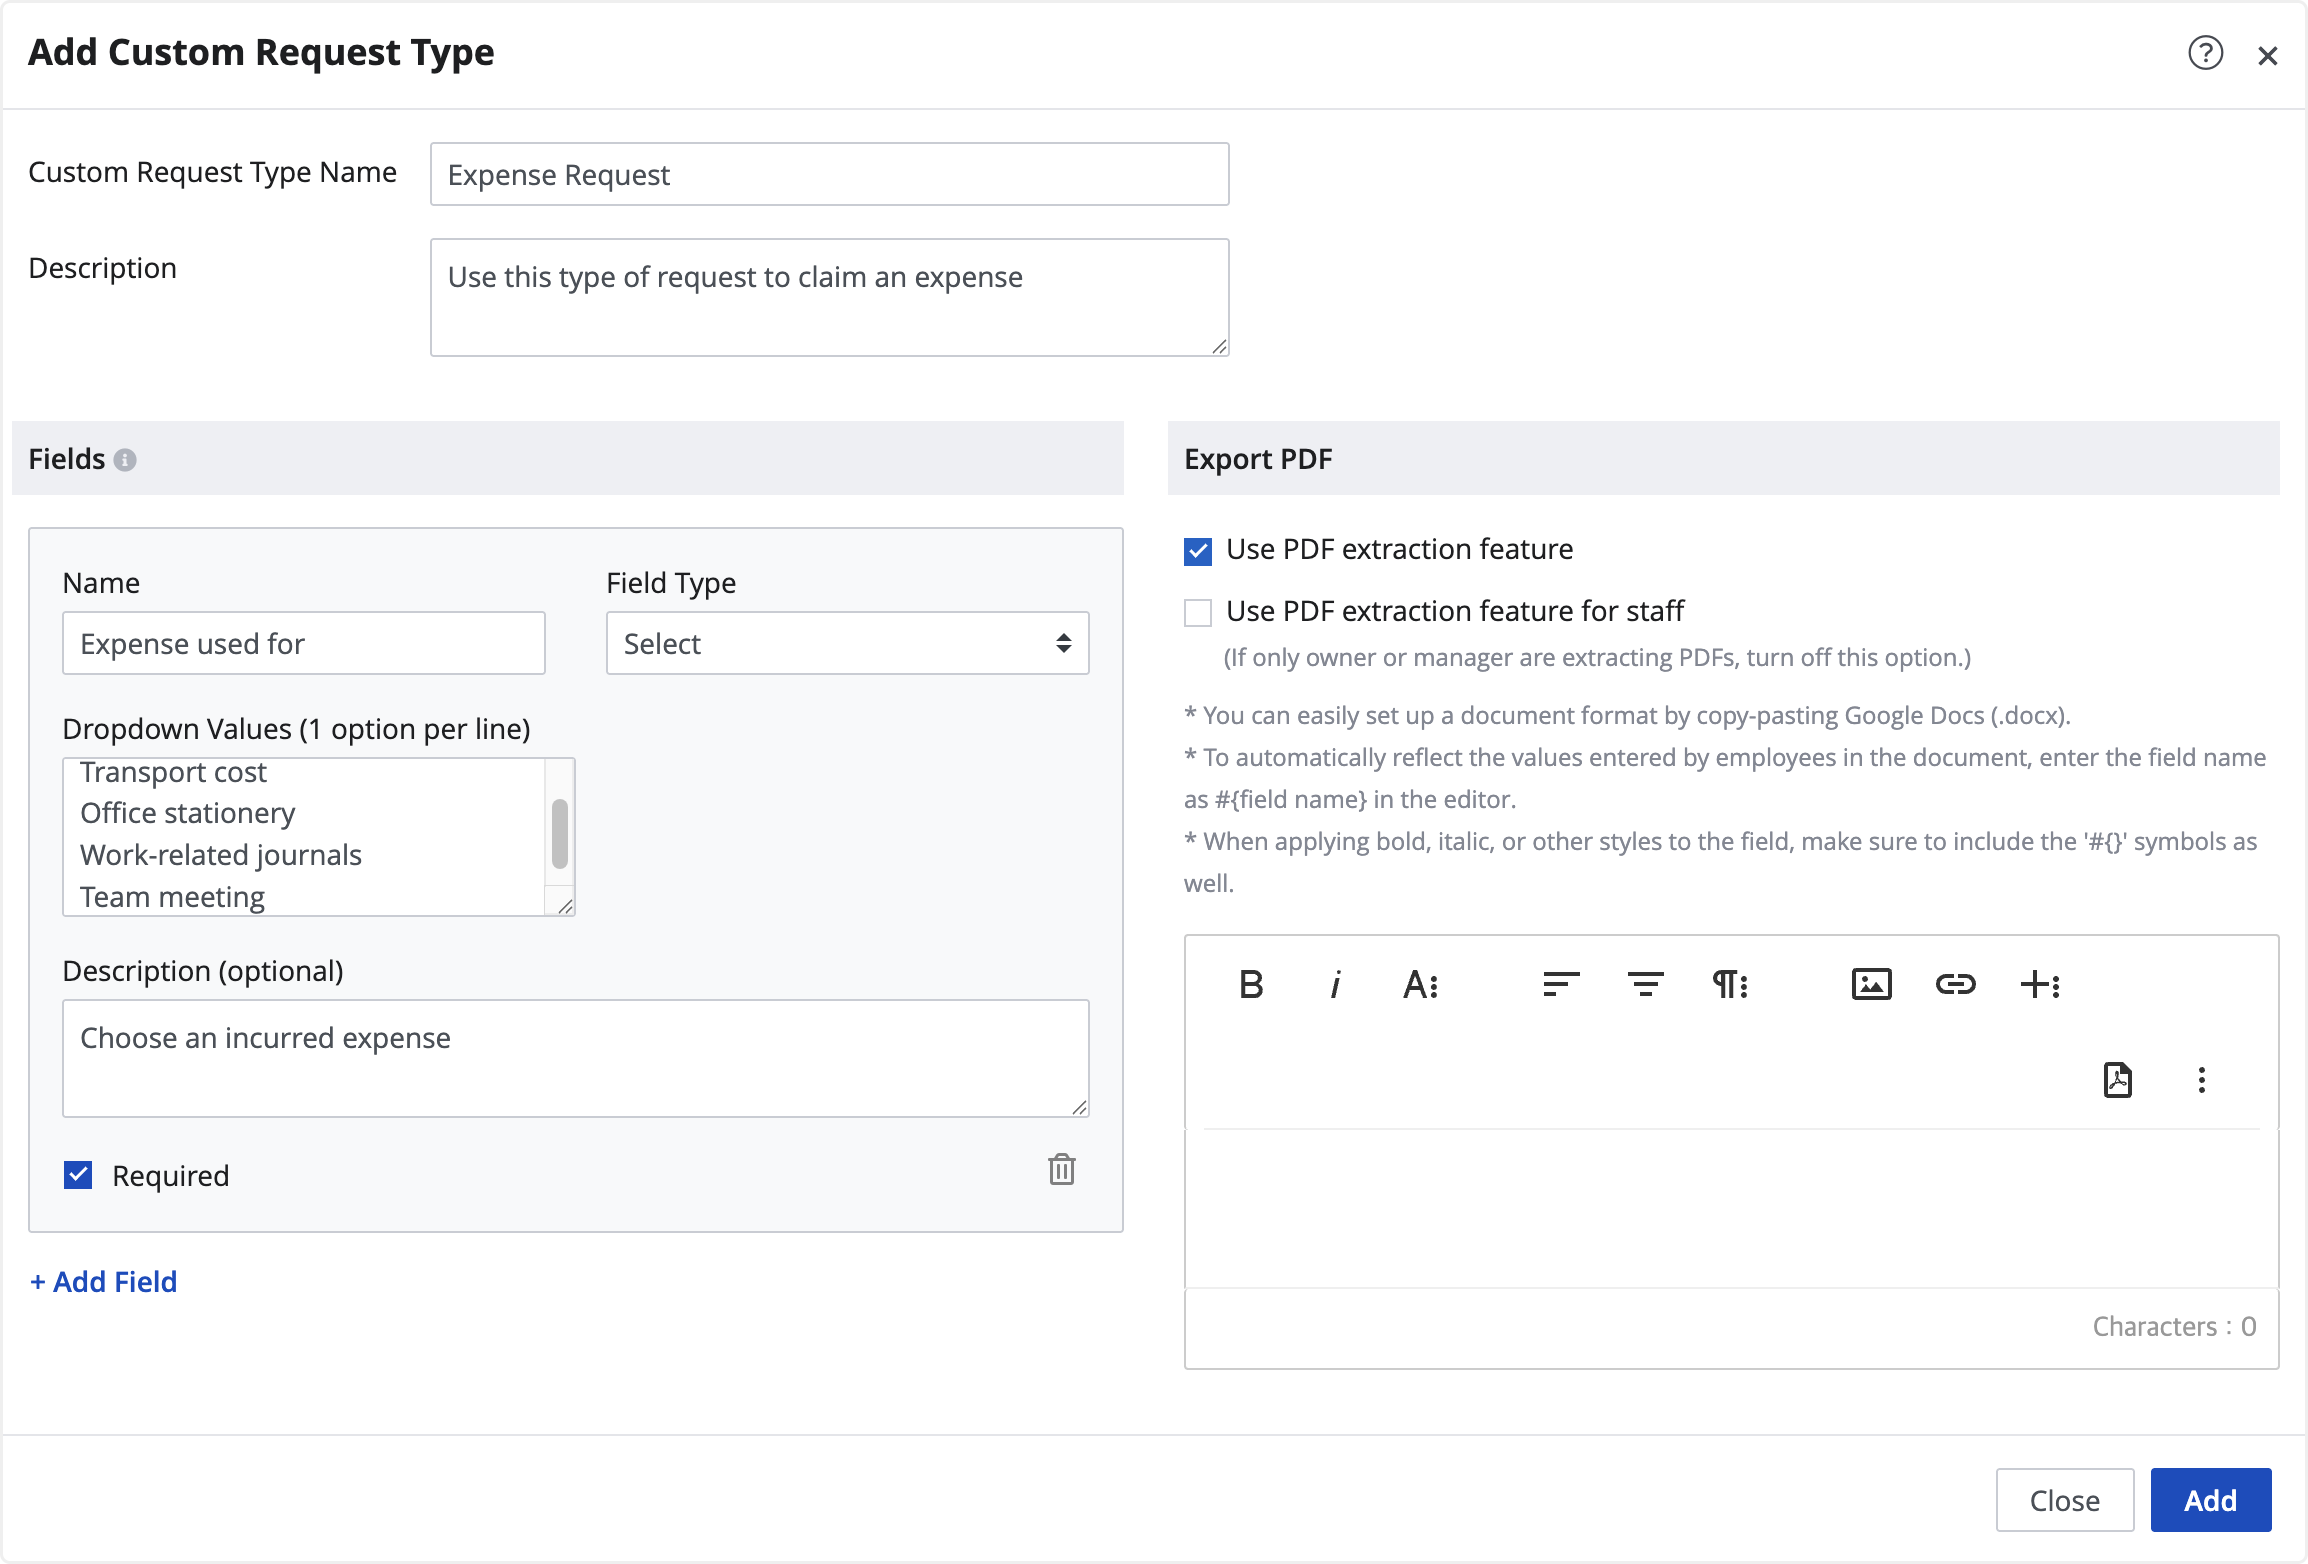
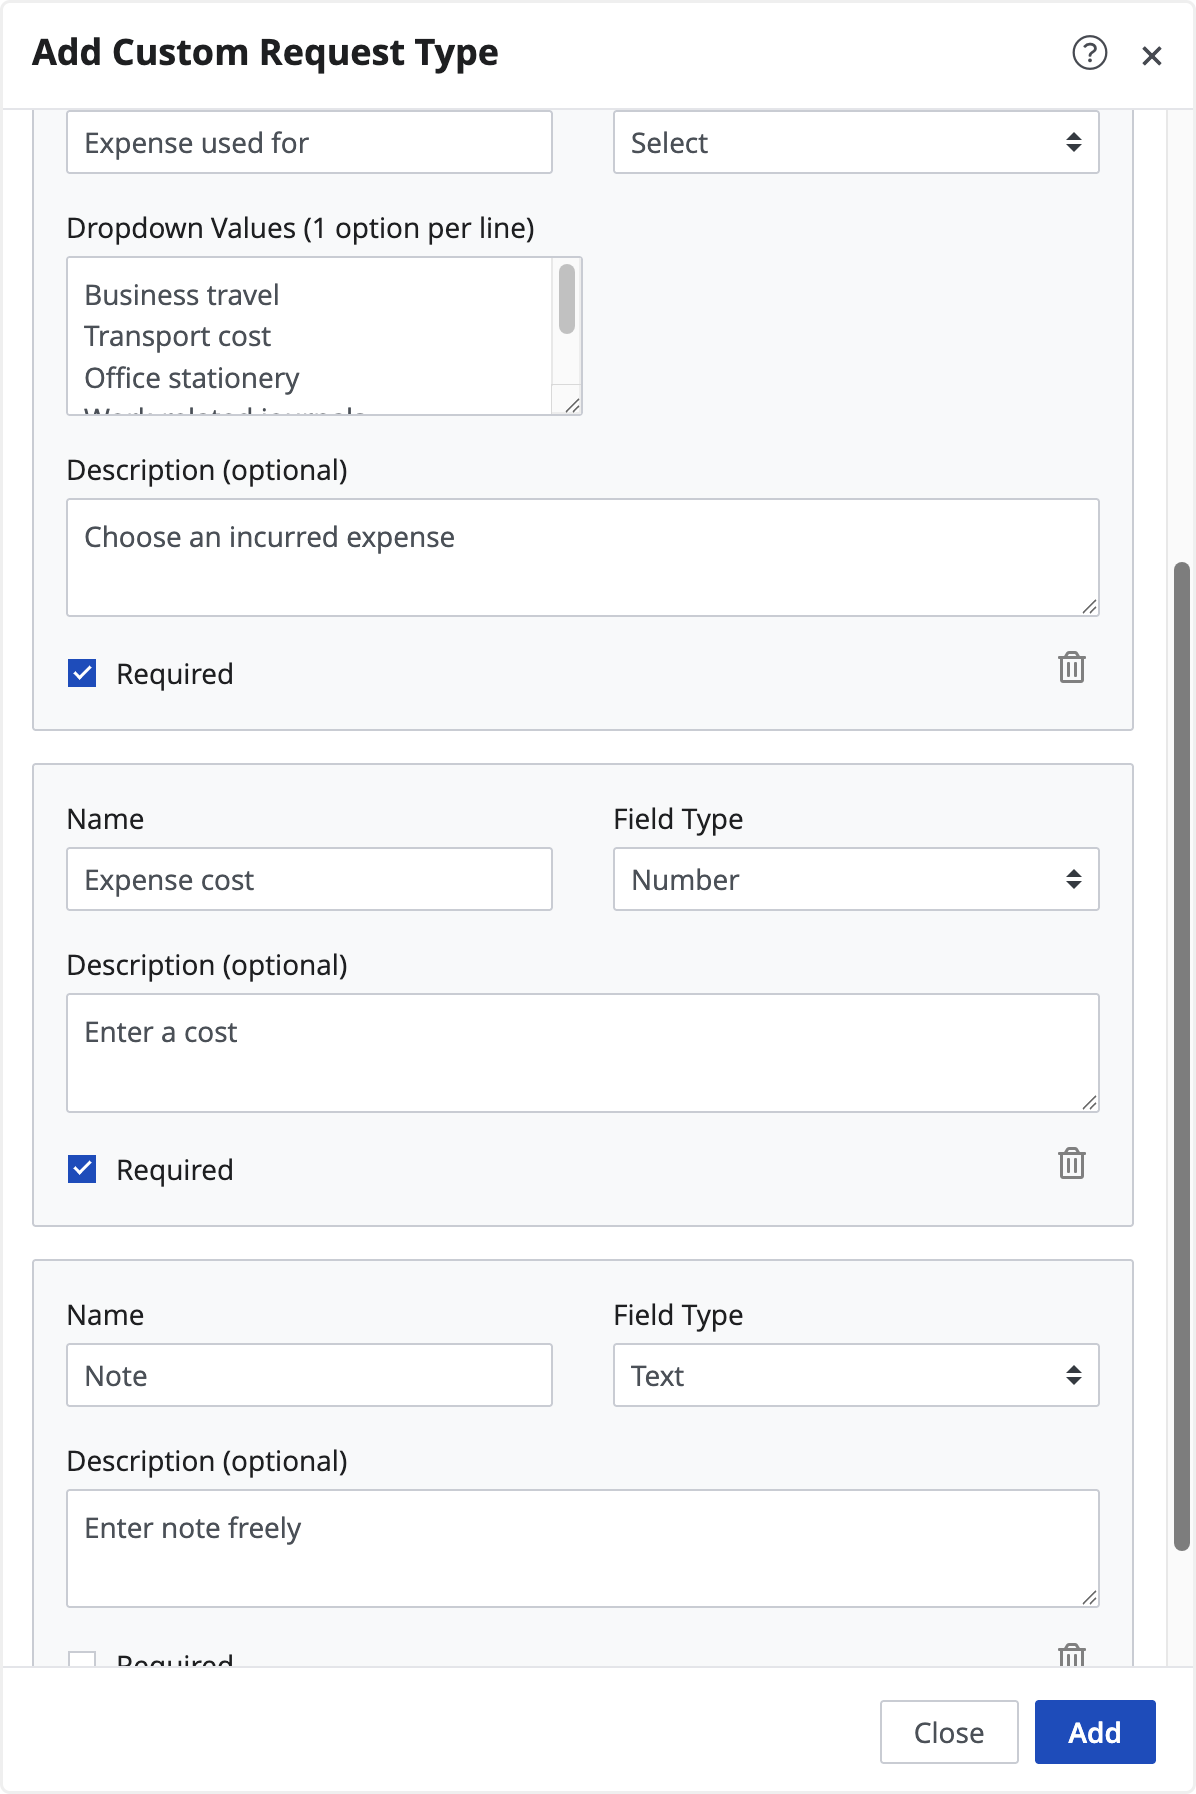
Click on + Add Field to add a customized field to a form.
Completed field is reflected as one item that employees can respond when making a request. You can add multiple fields to create a form.
- Name : Enter the name of a field.
- Description (optional) : Enter a brief description of this field.
- Field Type : Select a field type to respond this field.
- Text : You can respond in text format.
- Number : You can respond in number format.
- Date : You can select a date from the list.
- Checkbox : You can tap to respond.
- Select : You can select only one option from the list.
- Multi Select : You can select multiple options from the list.
- Rich Text: Requesters can compose content freely using the text editor.
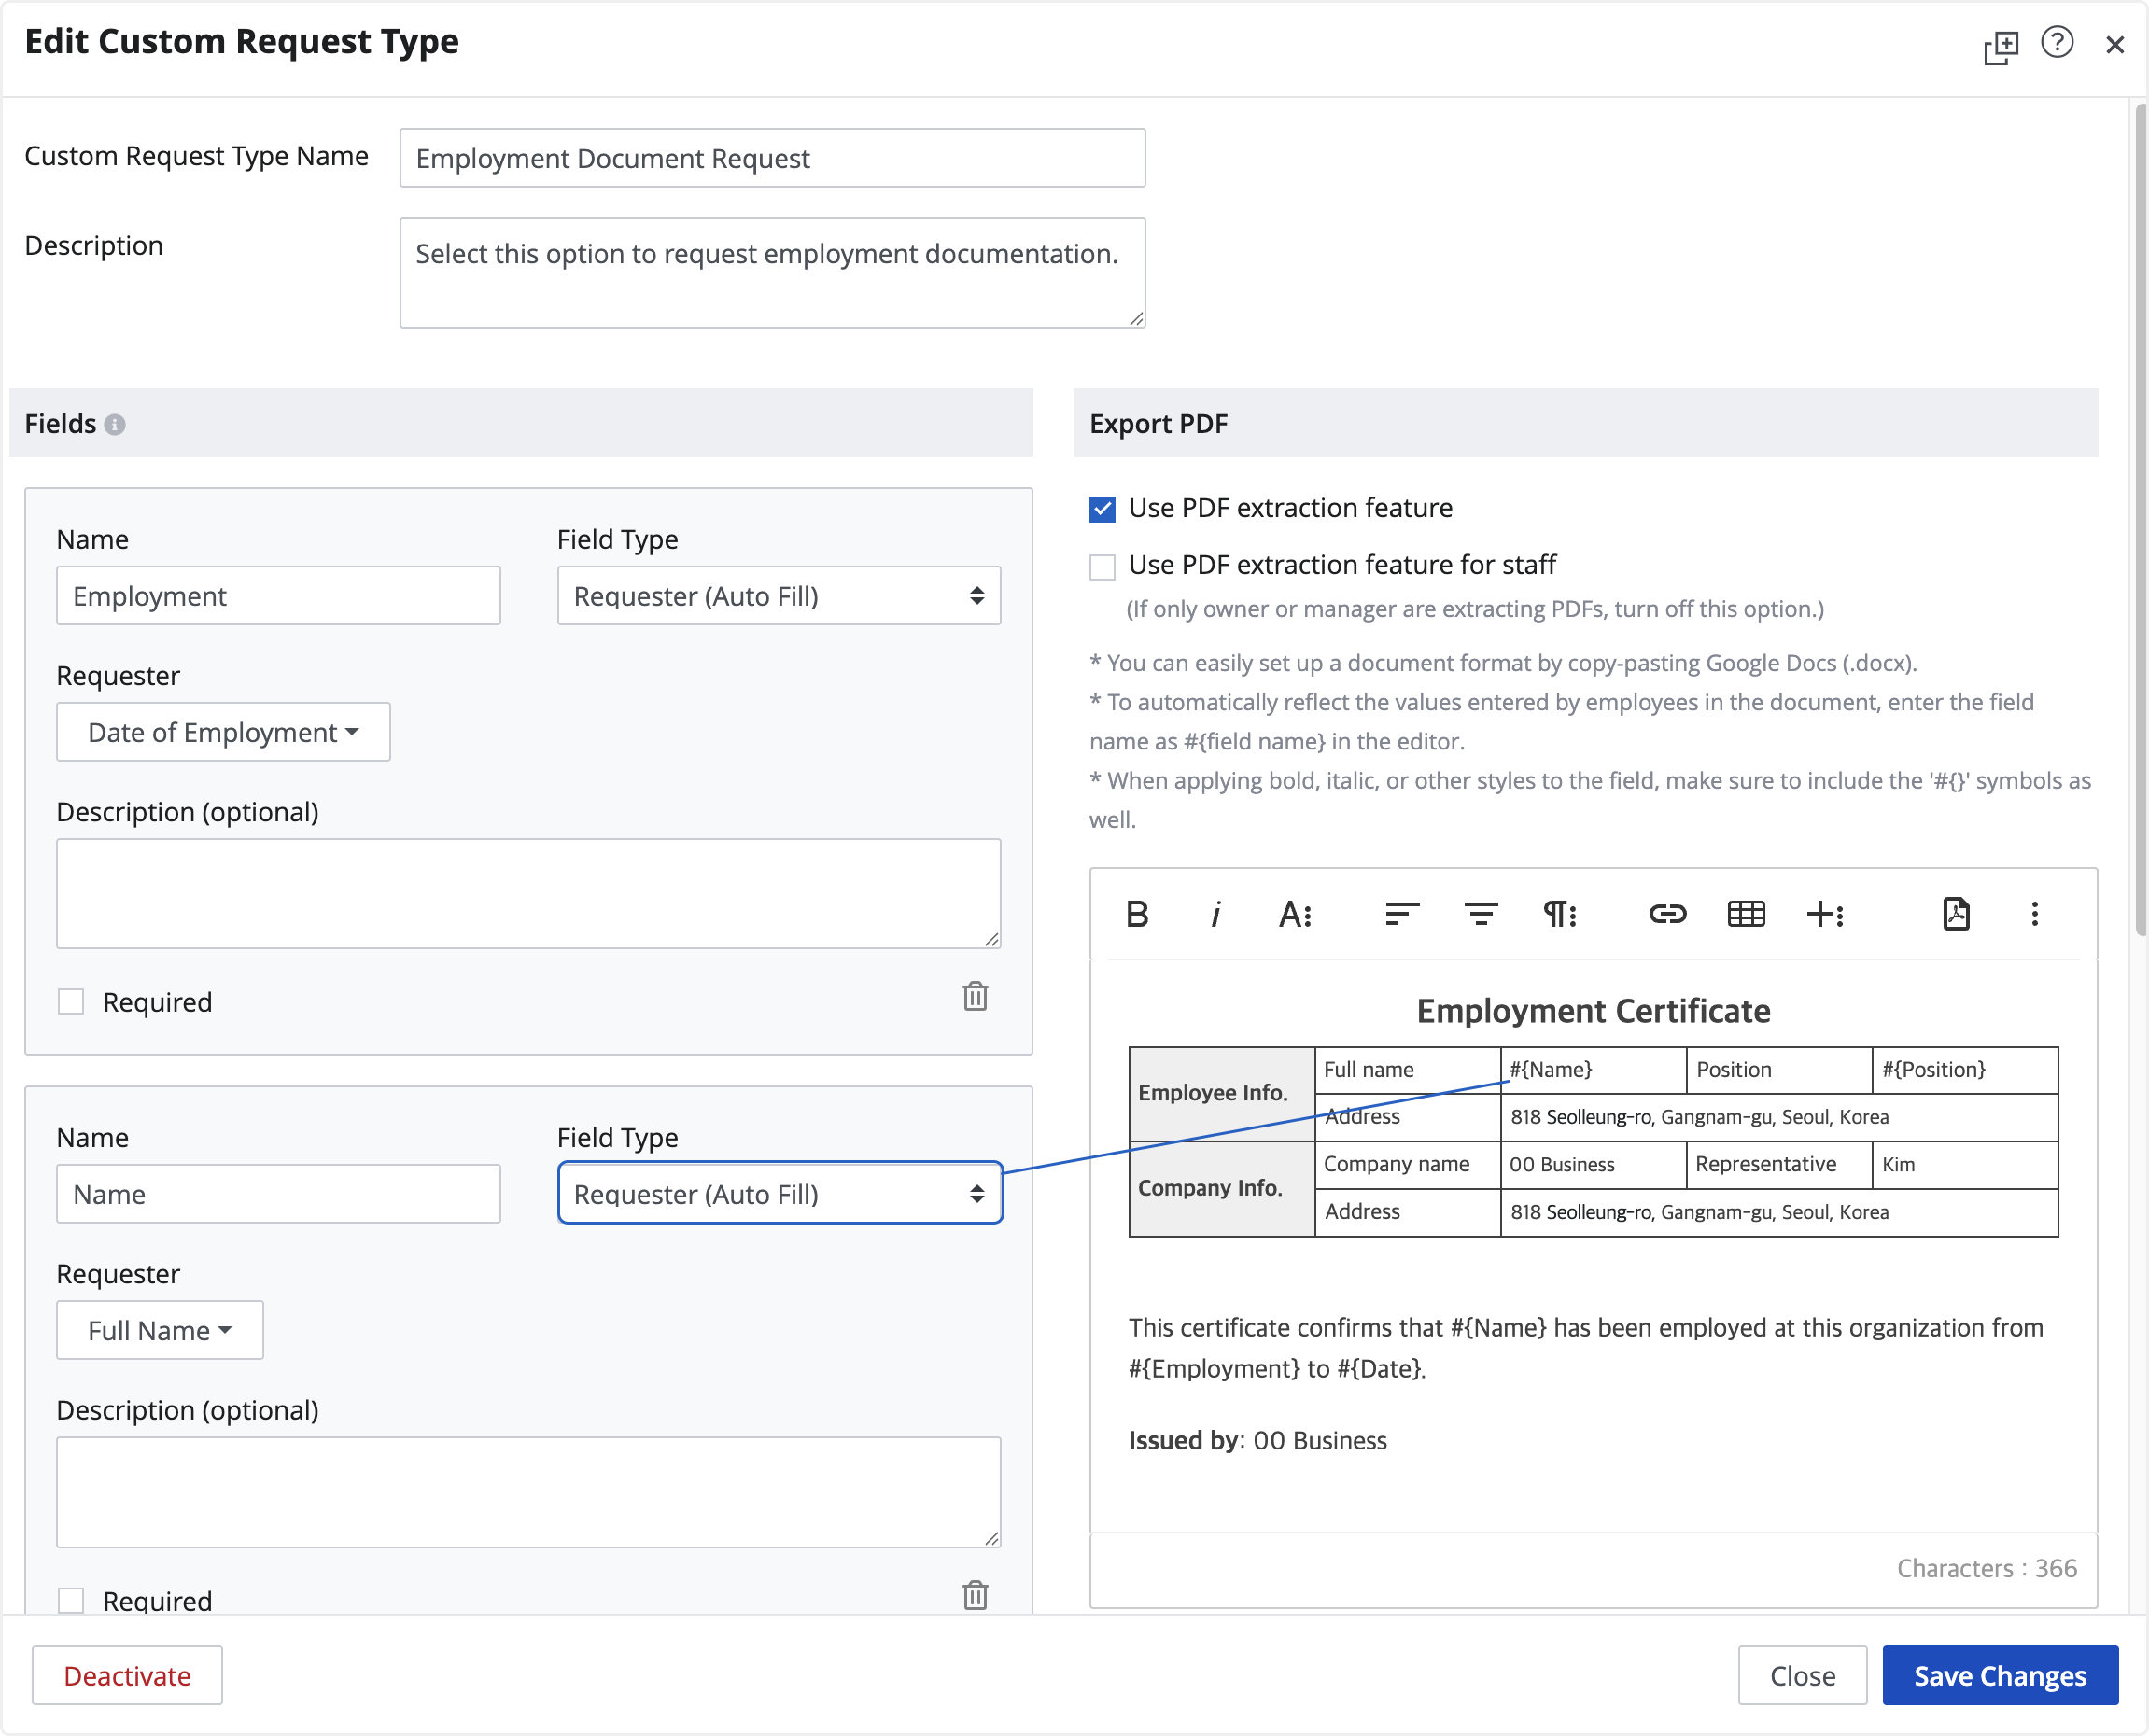
- Requester (Auto Fill): The requester's information is automatically filled when submitting a request.
- Text : You can respond in text format.
💡 Rich Text
When creating custom requests, requesters can compose content freely using the text editor.
Requesters can format text, add tables, use bullet points, and more to structure their own documents—making this suitable for various types of internal approval forms.

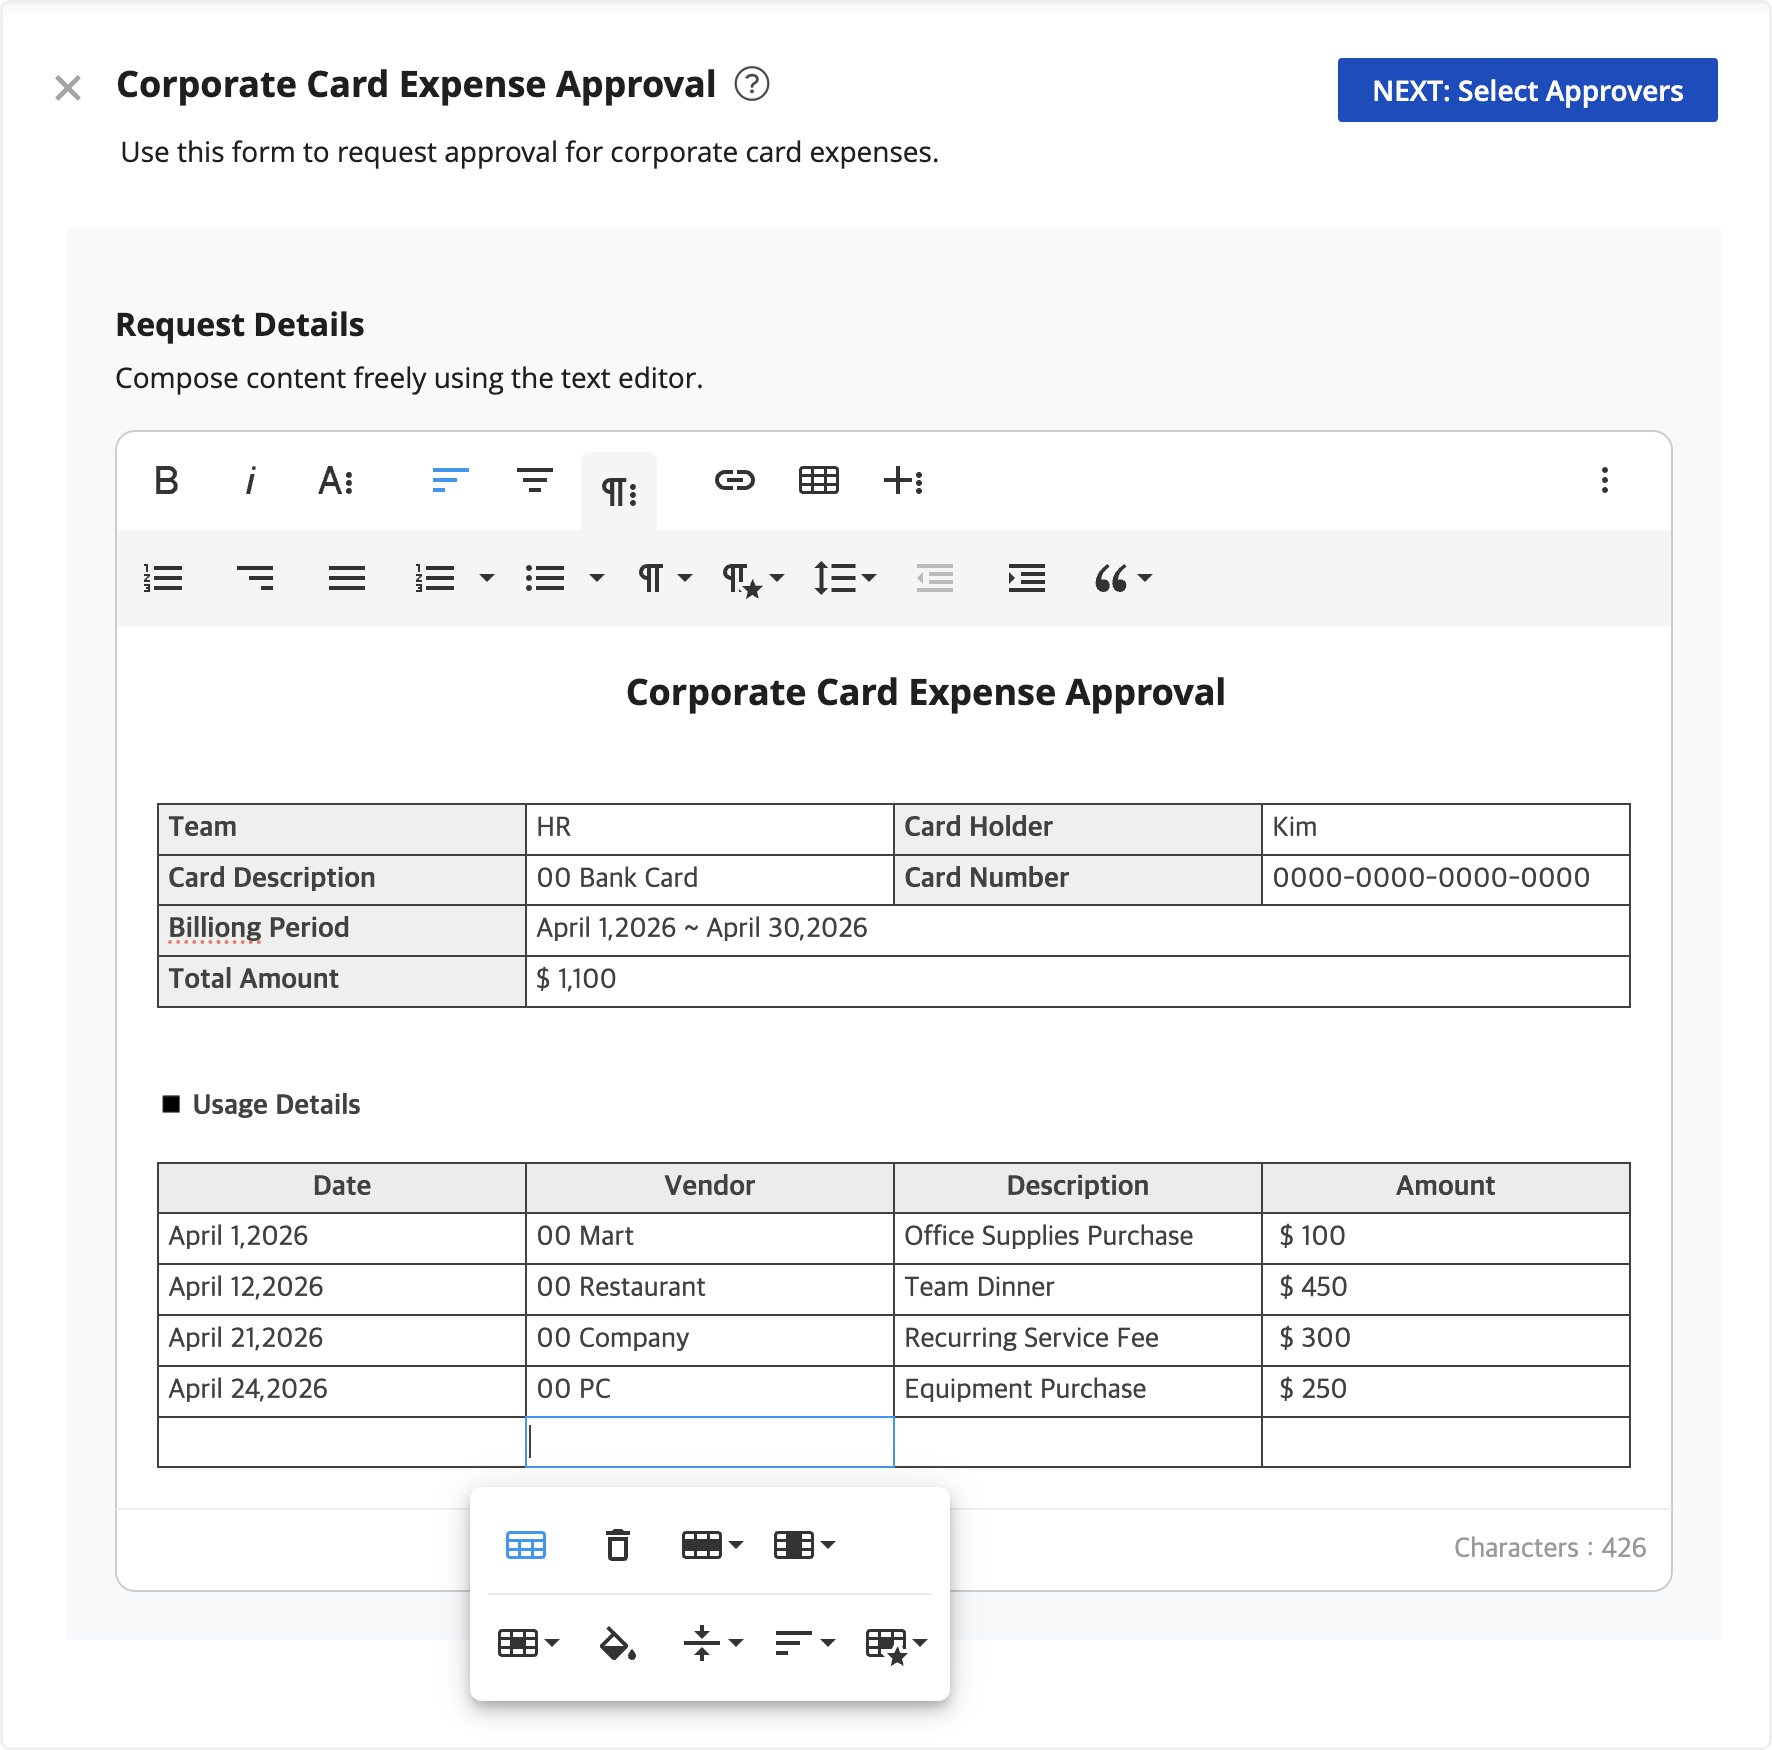
- Content entered in rich text field can be viewed when reviewing request details, viewing requests, and exporting to PDF after approval.
💡 Requester (Auto Fill)
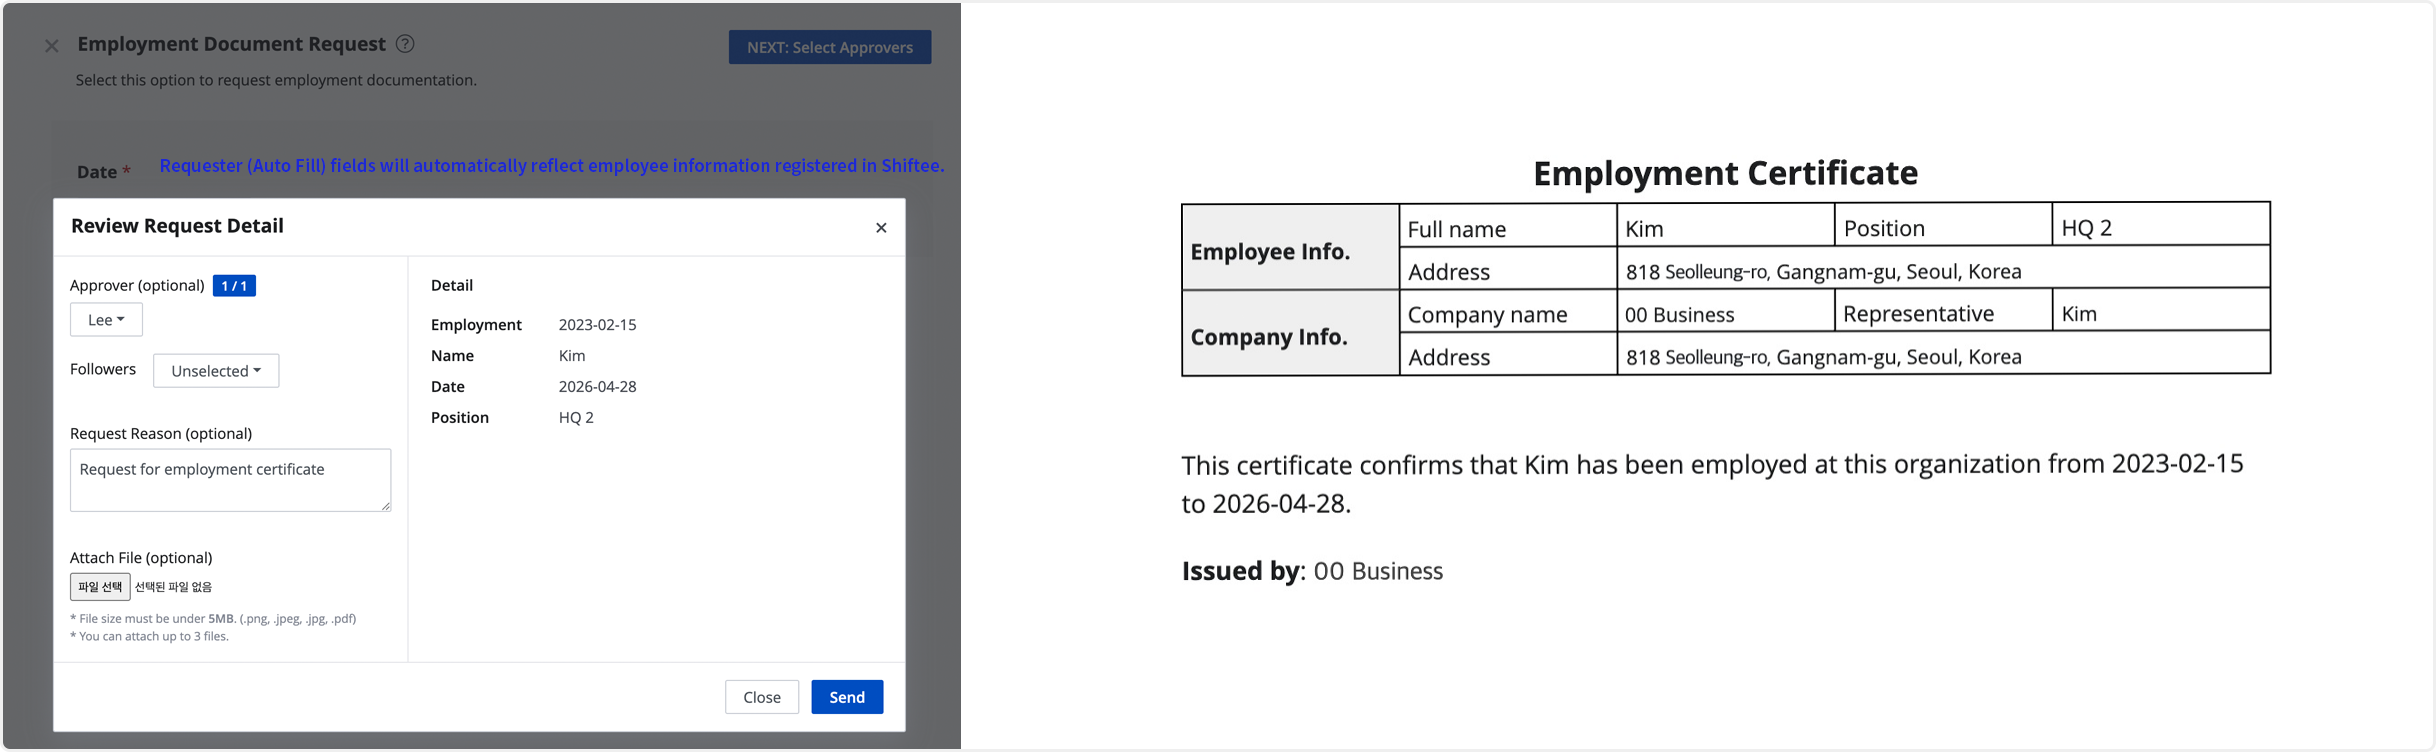
Based on the configured requester information settings, the employee's information is automatically filled in when submitting a request—eliminating manual entry and making this ideal for issuing employment documents.
Employees can review the auto-filled fields when submitting requests, and managers can view the auto-filled information when viewing request details and exporting to PDF after approval.
- Dropdown Values : This option only shows up when you choose a Single/Multi Select field type from ③. Enter choice options. (1 option per line)
- Required : Choose whether an answer is required for this item.
- Use PDF Extraction Feature : Choose to extract the request into PDF file.
- Use PDF Extraction Feature for Staff : Choose to allow employees to export custom requests as PDF files. Employees can download the PDF directly from the requests menu when documents such as certificates are required.
- Insert Images : You can insert images using image links. Use this option when you need to insert images such as company seals, company logos, or banners into a template. For detailed instructions, please refer to Example of Use ) Insert Images below.
Example of Use ) Insert Images
You can insert required images—such as a company seal, logo, or banner—into a template.
Add images at the desired location using an image URL.
💡 Note
Please ensure that the image is uploaded to Google Drive, an image hosting service, or another platform
where external sharing and public access are enabled before inserting it into the editor.
Example ① Using an Image from Google Drive
1) After uploading the image, change the sharing settings to ‘Anyone with the link’ and ensure that external access is enabled.
2) Click ‘Copy link’ to copy the image URL.

3) From the copied URL, extract and copy only the portion highlighted in bold (the Image ID)
https://drive.google.com/file/d/Image ID/view?usp=sharing
4) To ensure the editor can recognize the image, append the copied Image ID to the URL format below to create the final link. https://drive.google.com/thumbnail?id=Image ID
💡 Example
① Check the original Google Drive link
https://drive.google.com/file/d/1NexXOnXMw0ghHMhPT60U_1XWAFqIkiwh/view?usp=sharing
② Copy only the Image ID from the URL
1NexXOnXMw0ghHMhPT60U_1XWAFqIkiwh
③ Append the copied Image ID to the editor-compatible URL format
https://drive.google.com/thumbnail?id=1NexXOnXMw0ghHMhPT60U_1XWAFqIkiwh
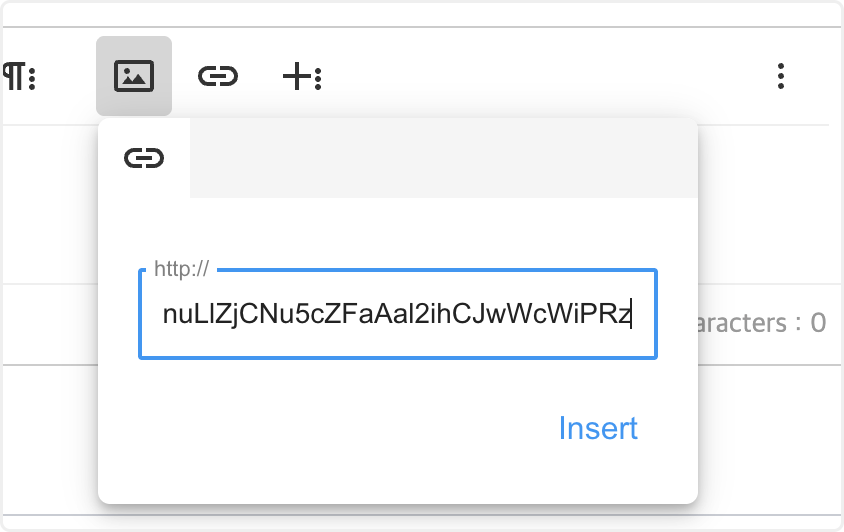
5) Click the image icon, paste the completed URL, and click “Insert” to add the image.
Example ② Using an Image Hosting Service
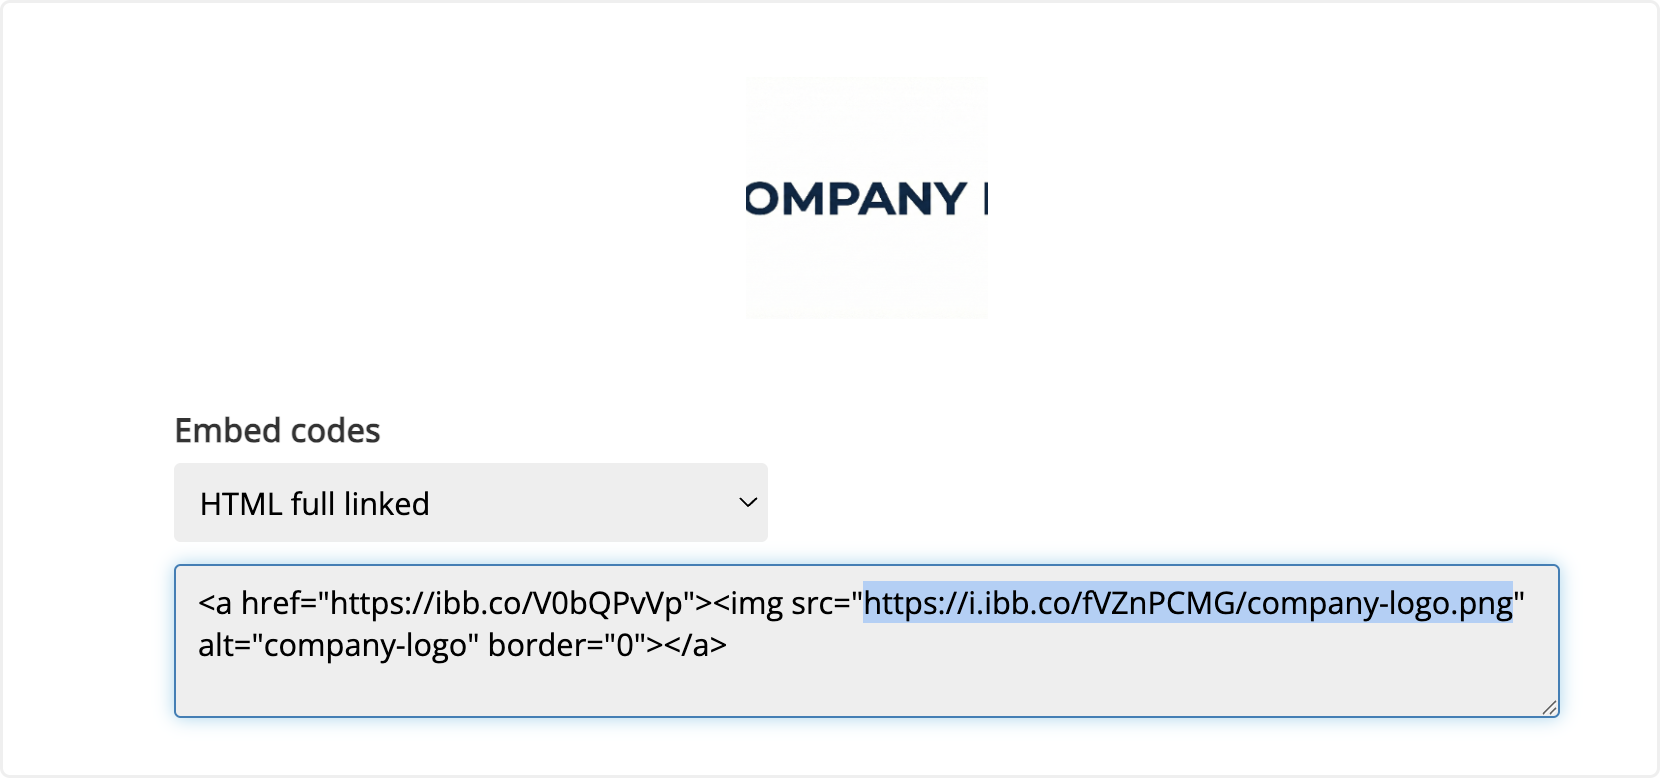
1) Upload the image via an image hosting service and review the provided HTML URL.
2) From the HTML URL, copy only the URL inside the quotation marks (" “) within the img src=” " attribute, as shown below.
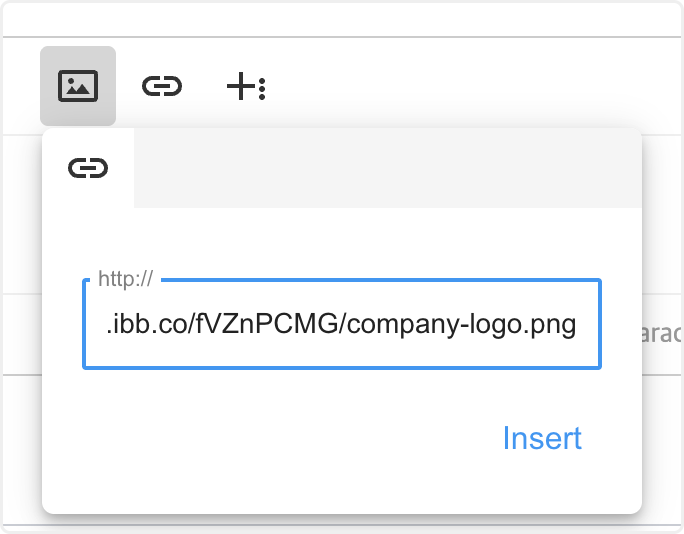
3) Click ‘Image icon > Paste the copied URL > Insert’ to add the image.
After inserting the image, you can adjust its size and position using the image editor.
💡 Note
To place an image next to text, select display > inline in the image editor.
The inline option aligns the image on the same line as the text. 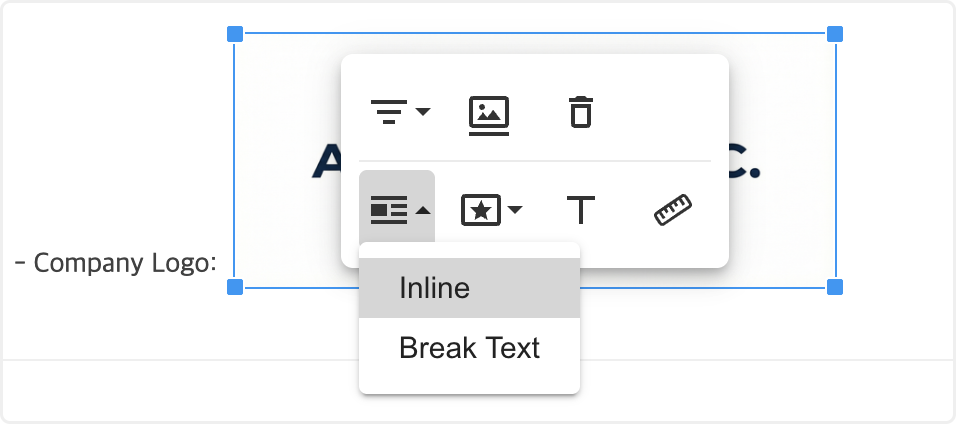
After saving the changes, a custom request type will be added as below. Use this feature to customize the approval workflows of your company.
💡 Note
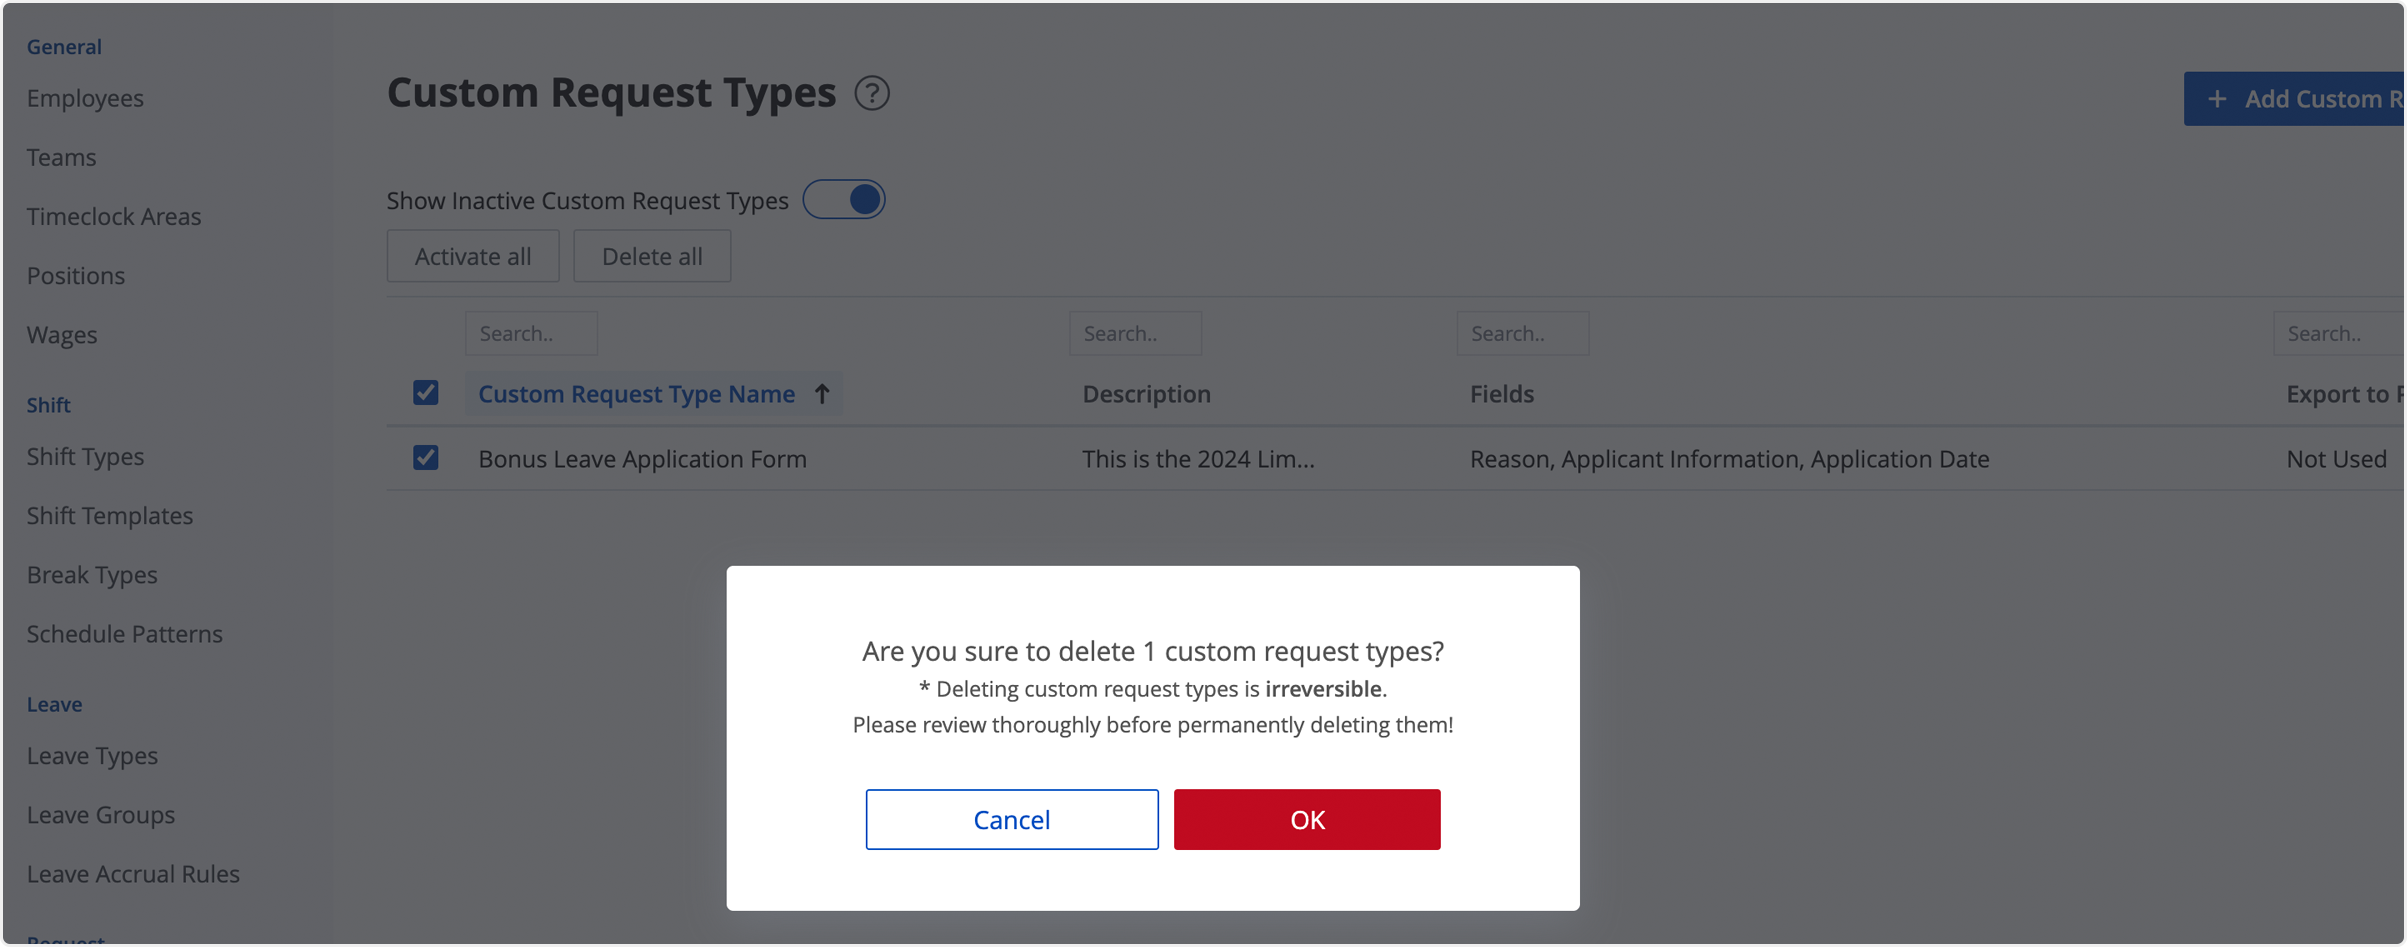 If a custom request type is no longer in use, you can manage it by using 'deactivate custom tequest types' feature.
- Select custom request types you want to inactivate from the list and click 'deactivate all'
- You can view inactive request types in 'show inactive custom request types' and delete them if necessary.
Custom Request Example
If you set a custom request as suggested, the result will be shown on the mobile app as below.
To create a custom request, see Create Custom Request.
• Custom Request Setting
• When Using the Custom Request

Note
• You can apply Approval Rules for a custom request.
• To approve or reject the request, see Manage Requests.