Getting Started Guide for Owner
Updated At: 2026-07-20
This is a getting Started Guide for new Owners to help you get a general idea of Shiftee.
Please follow along through this guide to set up your company successfully in Shiftee.
- Step 1. Sign Up
- Step 2. Create Company
- Step 3. Basic Set-Up
- Step 4. Add and Invite Employees
- Step 5. Manage Time and Attendance
- Step 6. Report
Step 1. Sign Up
First, please sign up for Shiftee.
You'll receive a confirmation email within 3 minutes to your email address you've registered.
Check your inbox and verify your email. (You don't need to verify your email address if you signed up with Naver/Google account)
You can use the registered account to access Shiftee via Web or Mobile app.
Please refer to the article below for further information.
Step 2. Create Company
Have you completed your registration?
Then, log in to Shiftee and start creating your own company.
Click Create Company button located at the left bottom of the Choose Company page.
Once you have created your own company, your account will be automatically set up with Owner access level.

Please refer to the articles below for further information.
Step 3. Basic Set-Up
Before you start managing employees' time and attendance, customize the following settings below based on your company preferences.
- 3-1. Management Unit
- 3-2. Timeclock Area
- 3-3. Teams and Locations
- 3-4. Positions
- 3-5. Company Settings
3-1. Management Unit
Select a management unit that fits best for your company from the following : Team and Location.
You can have this setting done in Company Settings - General menu.
Management Unit
• Team : Select if your company has Team-Based structure, e.g. HR, PR, Finance and so on.
• Location : Select if your company has Location-Based structure, e.g. Seoul Head Office,
NY Branch office and so on.
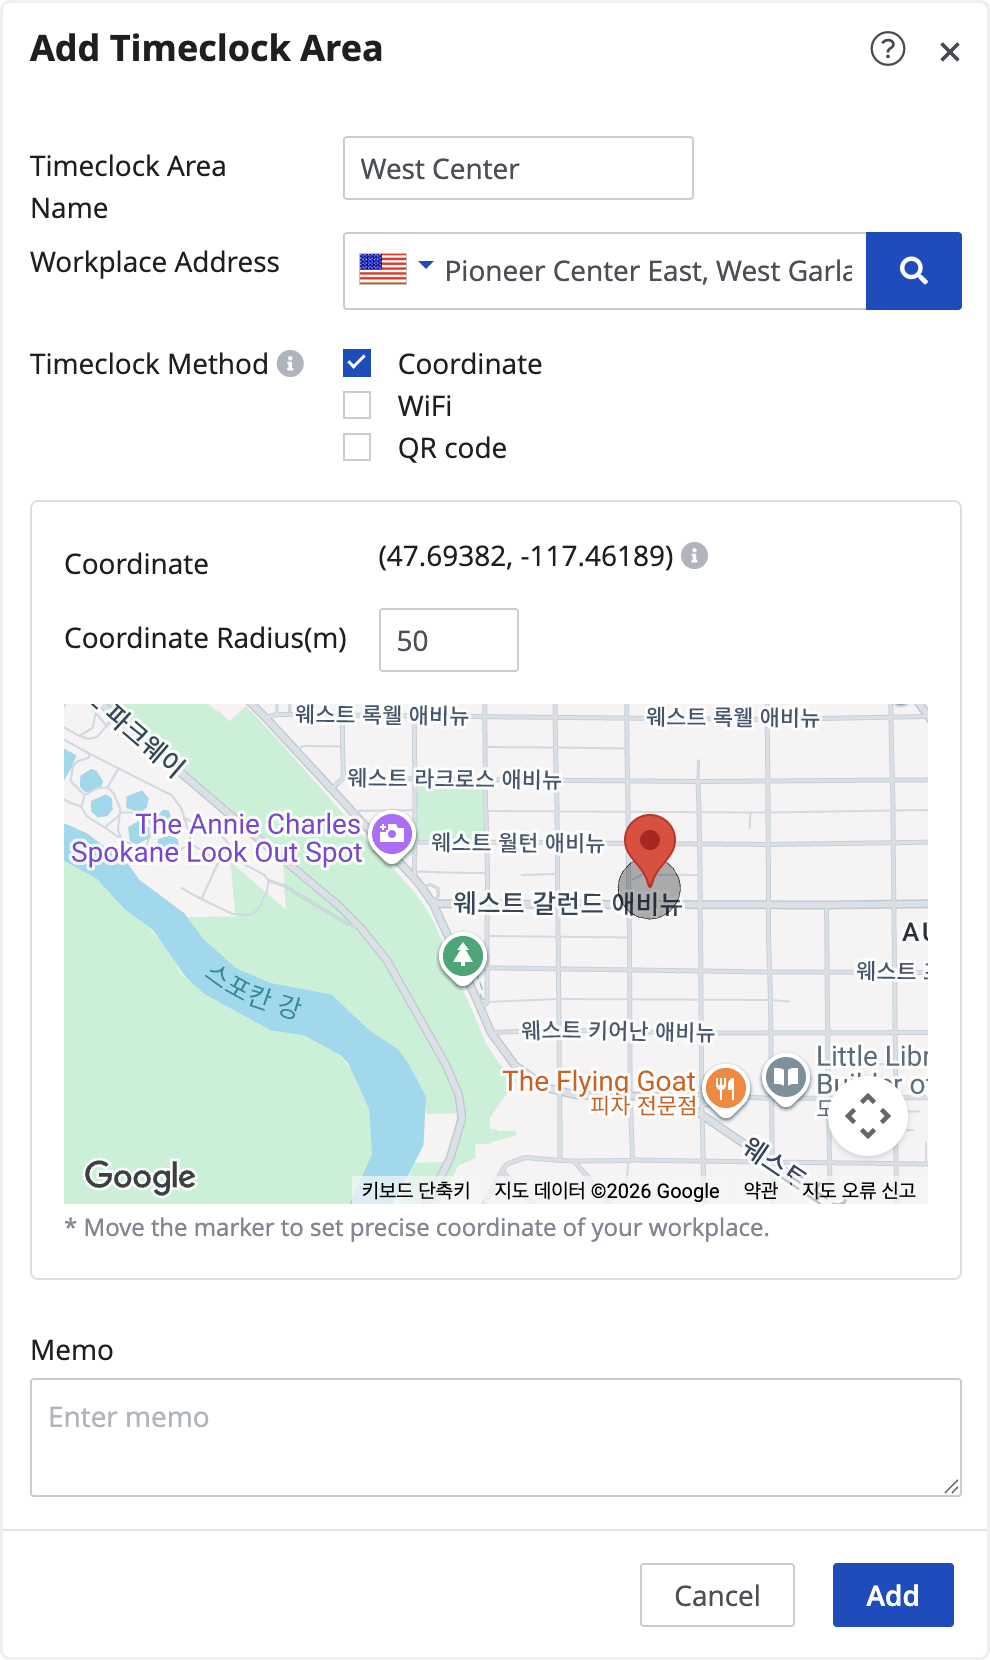
3-2. Timeclock Area
Set up Timeclock Areas for your teams and locations.
Employees can clock in/out using coordinate, WiFi, or QR code verification. Multiple timeclock methods can be configured for each area.
If you have multiple timeclock areas, you can register them in bulk using the Excel file provided.
See the article below for more details.
3-3. Teams And Locations
Have you completed setting up Step 3-2 Timeclock Areas?
Then, let's move on to 'Team/Location' tab to add new Teams and Locations.
Select Timeclock Areas that you'd like to use for each Team/Location when clocking in and out.
If you have a number of Teams and Locations, you can upload them in bulk with the Excel file provided.

Please refer to the articles below for further information.
3-4. Positions
Add positions to identify employees with different duties and job positions.
Shiftee recommends you to use positions simply, like approvers and non-approvers for general use.
Use of Positions
• Team Leader / Team Member
• Department Manager / Staff
• Approvers / Non - Approvers
Please refer to the articles below for further information.
3-5. Company Settings
Owner can customize all features and configurations in company settings that fit best for company's policy.
Shiftee recommends you to customize the following menus with high priority.
• Company Settings - Permission
• Company Settings - Scheduler
• Company Settings - Timeclock
• Company Settings - Breaks
• Company Settings - Request
Then, finish setting up the rest of the features in Company Settings.
If you have any questions regarding company settings, please feel free to leave questions to support@shiftee.io
Please refer to the article below for further information.
Step 4. Add and Invite Employees
Congratulations! You have completed the very basic settings of Shiftee.
Now it's time to add and invite employees to join Shiftee.
You can add employees and assign the teams and positions you've set in advance to your employees. Send an Invite Code straight away to your employees via email or text.
If you have a number of employees, you can upload them in bulk with the Excel file provided.

Please refer to the article below for further information.
Note that you can manage employees' time and attendance in detail with overtime work and more if you complete employees' Wage Info set-up.
Step 5. Manage Time and Attendance
Shiftee provides the most effective tool to manage work schedule, attendance, leave and request at once. Check out the features you would like to know more from the list below.
5-1. Shift
With Shiftee, you can plan shifts that fit into all work schedule cases.
Work schedules are shared with employees in real time, so employees can easily check their schedules on both PC and Mobile.
Before you get started with Scheduling, Shiftee recommends you to create Shift Templates first.
Use templates to plan the repeated work schedules for multiple employees.
This can help you to highly minimize your time spent on scheduling.
Try using deemed work feature for types of work where it's difficult to have employees to accurately clock-in/out.
Shiftee provides 2 different types of scheduling system. Use either way to schedule shifts.
- ① Top down Scheduling : Managers create and manage employees' work schedules.
- ② Bottom up Scheduling : Employees plan or change their own schedules and ask managers for approval.
Please refer to the articles below for further information.
5-2. Attendance
Employees are allowed to clock in and out only within their timeclock areas. This helps managers supervise their employees' time and attendance more accurately.
Attendance record is automatically linked with a shift which makes it easier to check employees' attendance status. (Tardiness, Absence, Overtime work hours, etc)
Please refer to the articles below for further information.
5-3. Leave
You can manage all types of leaves and vacations and automate related processes such as request-approval or leave accruals in Shiftee.
Create different leave types suitable for your company's needs and register working hours, annual leave deductions for accurate calculation. Based on the settings, Shiftee provides integrated analysis of remaining leaves as well as leave accrual records.
Please refer to the articles below for further information.
5-4. Request
Shiftee provides Request-Approval process that centralizes all requests from employees regarding schedule, attendances, leaves and more.
To build a systematic approval lines for requests, set up detailed Approval Rules accordingly.
Monitor requests in real time in Manage Requests menu. You can approve or reject requests with just one click.
Please refer to the articles below for further information.
Step 6. Report
Shiftee provides more than 50+ report items from schedules to leaves which can also be exported to Excel files for internal use.
You can customize the columns in report page from Company Settings - Advanced menu.

Types of Reports
You can export the following reports over a selected period of time.
• Schedule : Weekly·Monthly Calendar, Monthly Summary, Shifts
• Attendance : Attendance (Calendar/List), Payroll
• Leave : Leaves
• Request : Requests
• Report : Report including all columns such as work hours, overtime, leave days, etc
Please refer to the articles below for further information.
Need more help using Shiftee? Visit Shiftee Help Center for more help.
If you have any further questions, please feel free to contact support@shiftee.io