Timeclock Area - QR Code
Updated At: 2026-07-20
- Print the generated QR code and display it at your workplace. Employees can scan it to clock in and out.
- After scanning the QR code, additional verification is performed using the configured timeclock method (coordinate or WiFi) for accurate clock in/out records at your workplace.
💡 Note
- To set up coordinate as a timeclock method, see Timeclock Area - Coordinate.
- To set up WiFi as a timeclock method, see Timeclock Area - WiFi.
Web
STEP 1 ) Go to Manage > Timeclock Areas and click Add Timeclock Area in the top right.
If you have multiple timeclock areas, click Upload to register them in bulk using an Excel file. 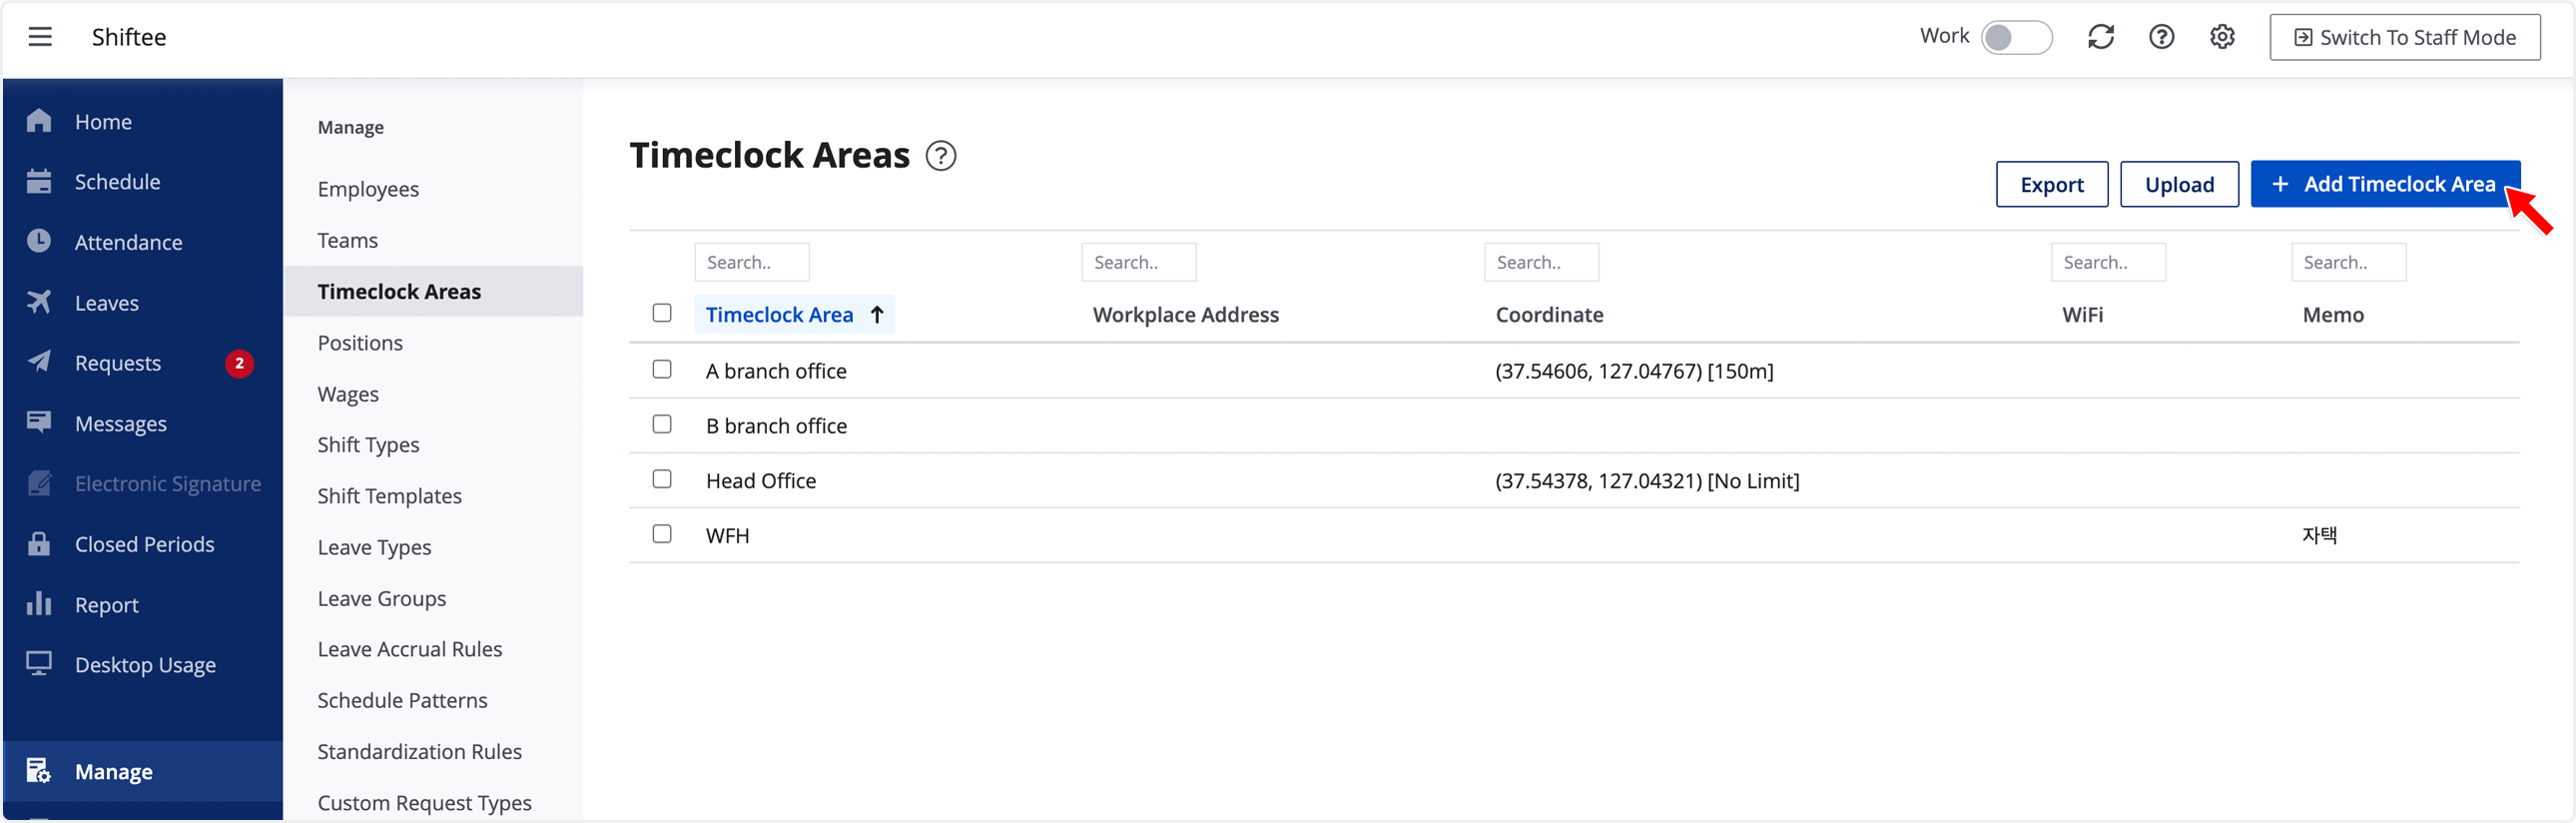
STEP 2 ) Configure the Timeclock Area to be used for clock in/out in each team or location.
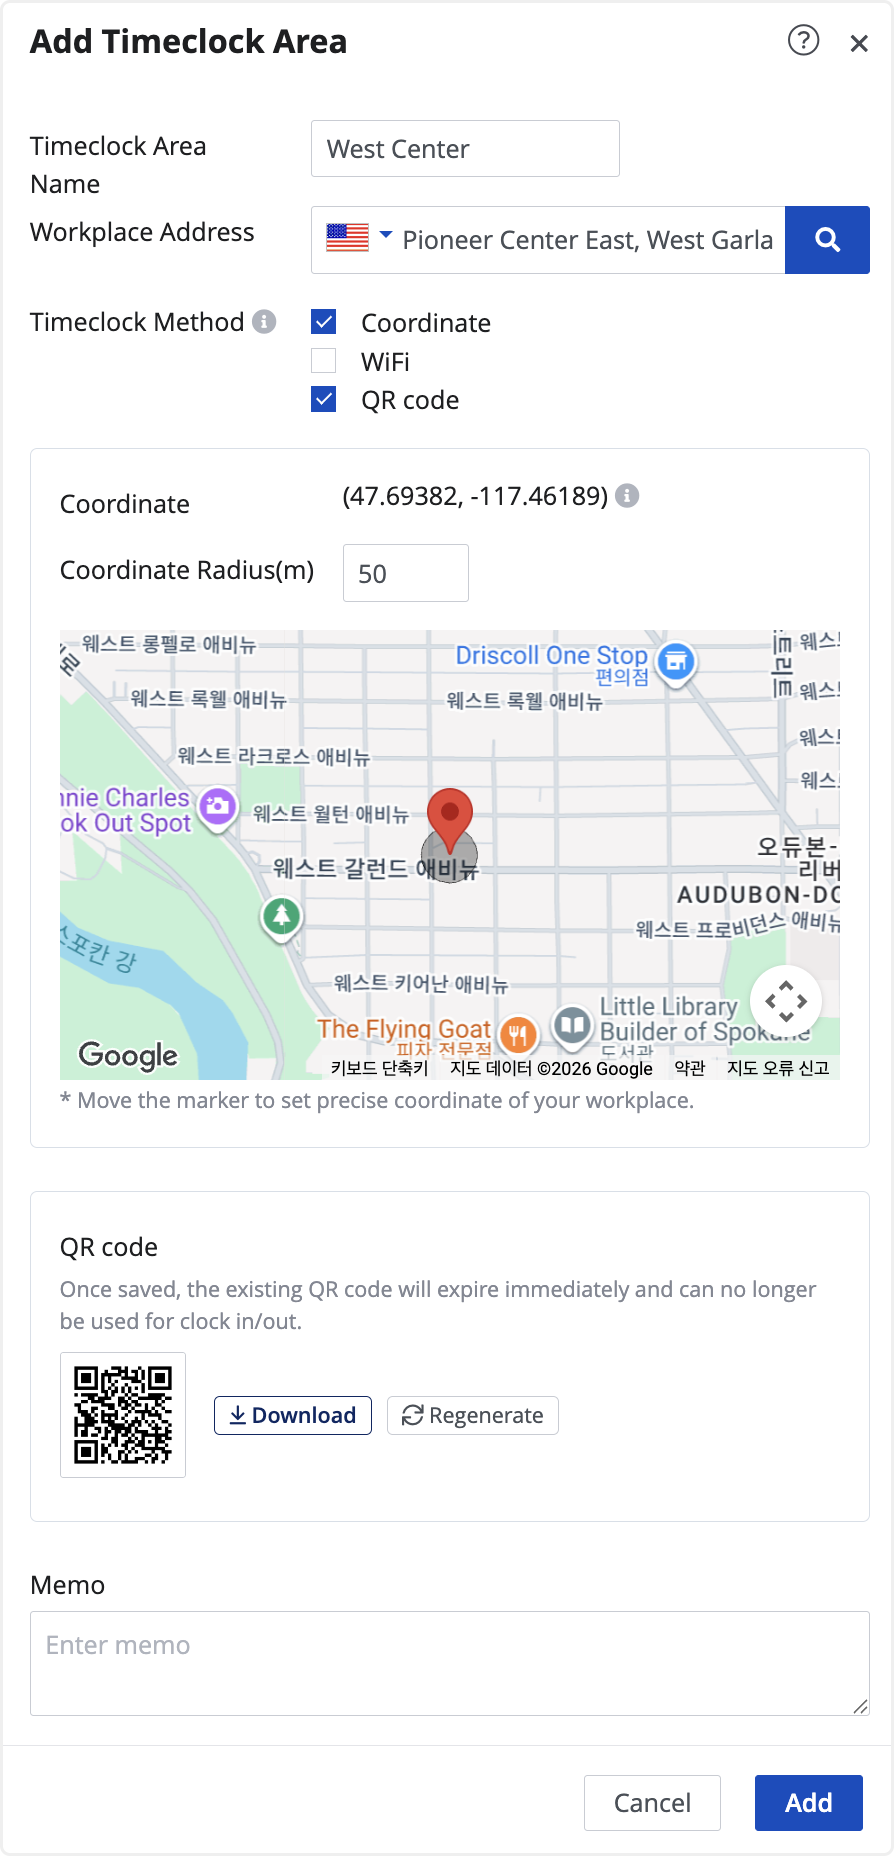
① Workplace Address: Enter the address of the timeclock area. Suggested addresses will appear as you type.
② Timeclock Method: Select QR code as a timeclock method. QR code requires at least one of coordinate or WiFi to be configured for additional verification after scanning.
③ QR Code: Download the generated QR code image. Print and display it at the timeclock area for employees to scan when clocking in and out.
💡 Note
Both coordinate and WiFi can be configured as additional verification methods. When both are set, clock in/out succeeds if either method is verified.
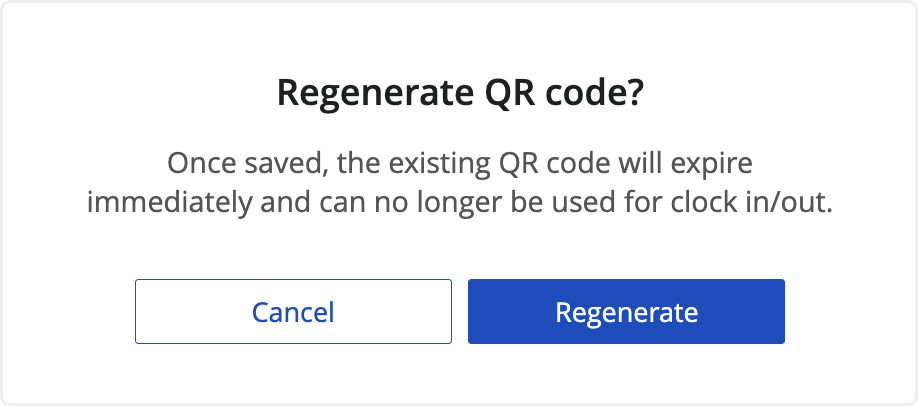
Once a QR code is regenerated and saved, the existing QR code expires immediately and can no longer be used.
Mobile
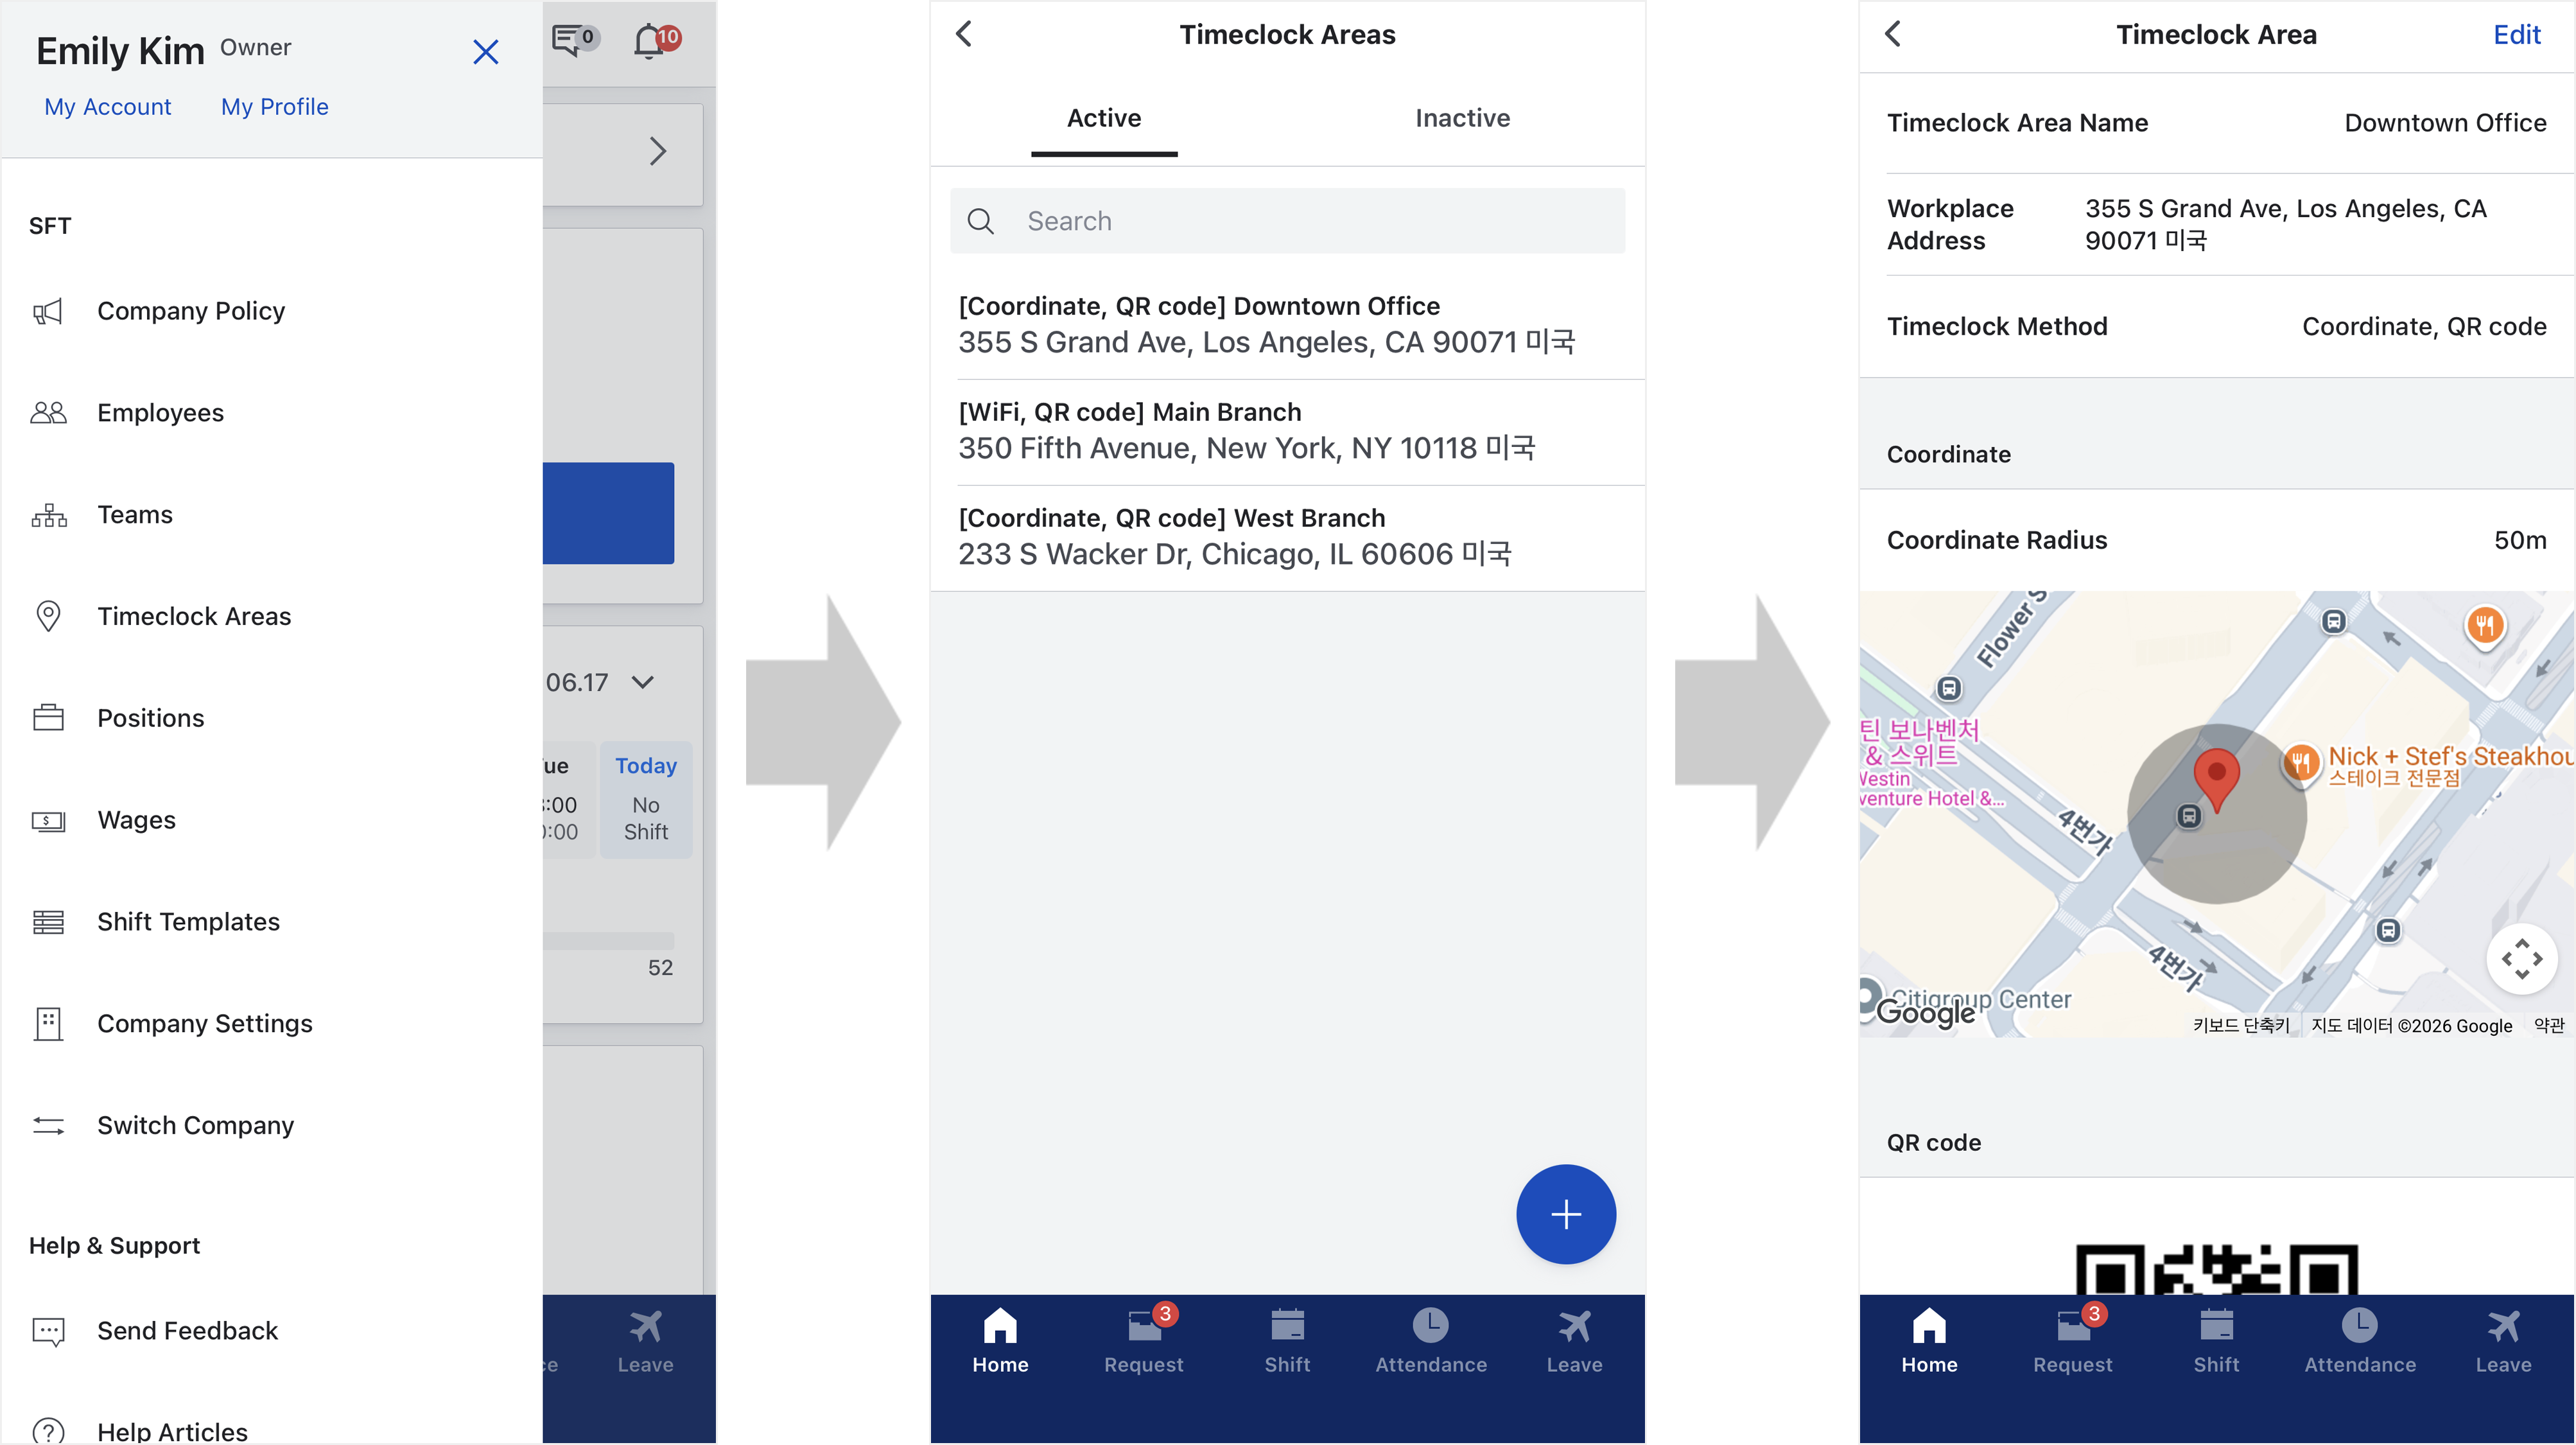
STEP 1 ) Tap menu on the top left, then tap Timeclock Area.
STEP 2 ) Add a new timeclock area or select an existing one from the list to edit.